Who wants to go spelunking?
It’s time for another Patreon-sponsored Side Quest! For those of you who are new to our blog, we post a monthly Side Quest, which are short, free TTRPG encounters with corresponding maps that can be easily threaded into an ongoing or one shot campaign, allowing busy DMs to throw in a random encounter at the drop of a hat. Our Legend tier allows our Patrons to pick the game system, theme, and name a character or two in an upcoming Side Quest. We create a free adventure around their idea, and now everyone gets to enjoy this free D&D One Shot! Plus, Patrons receive a downloadable version of all our Side Quests.
For our fourth Patron sponsored Side Quest, we received this theme request: “An encounter in the depths of a crystal mine with the final boss as a crystal elemental”. This week’s Side Quest features a trek through crystalline caverns fraught with danger. Best suited for adventurers level 4-5.
Disclaimer: This post contains affiliate links, meaning we may receive a small commission from qualifying purchases if you click on our links, at no additional cost to you. As Amazon affiliates, we may earn from qualifying purchases. You can see our full disclosure here. Thanks for supporting your favorite dungeon artists!
Reference Resources Needed
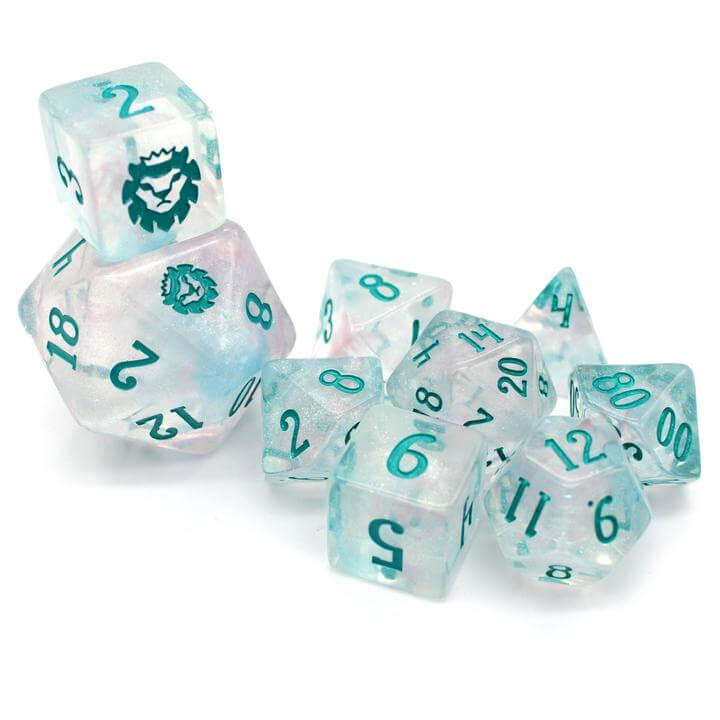
Dice Spotlight: Fifolet
Need some on-theme dice to get you into this crystalline mood? Check out this crystalline set from Dice Envy! The transparent nature of this acryllic set will help set the tone for this encounter.
Use code lightheartadv for 10% off your order!
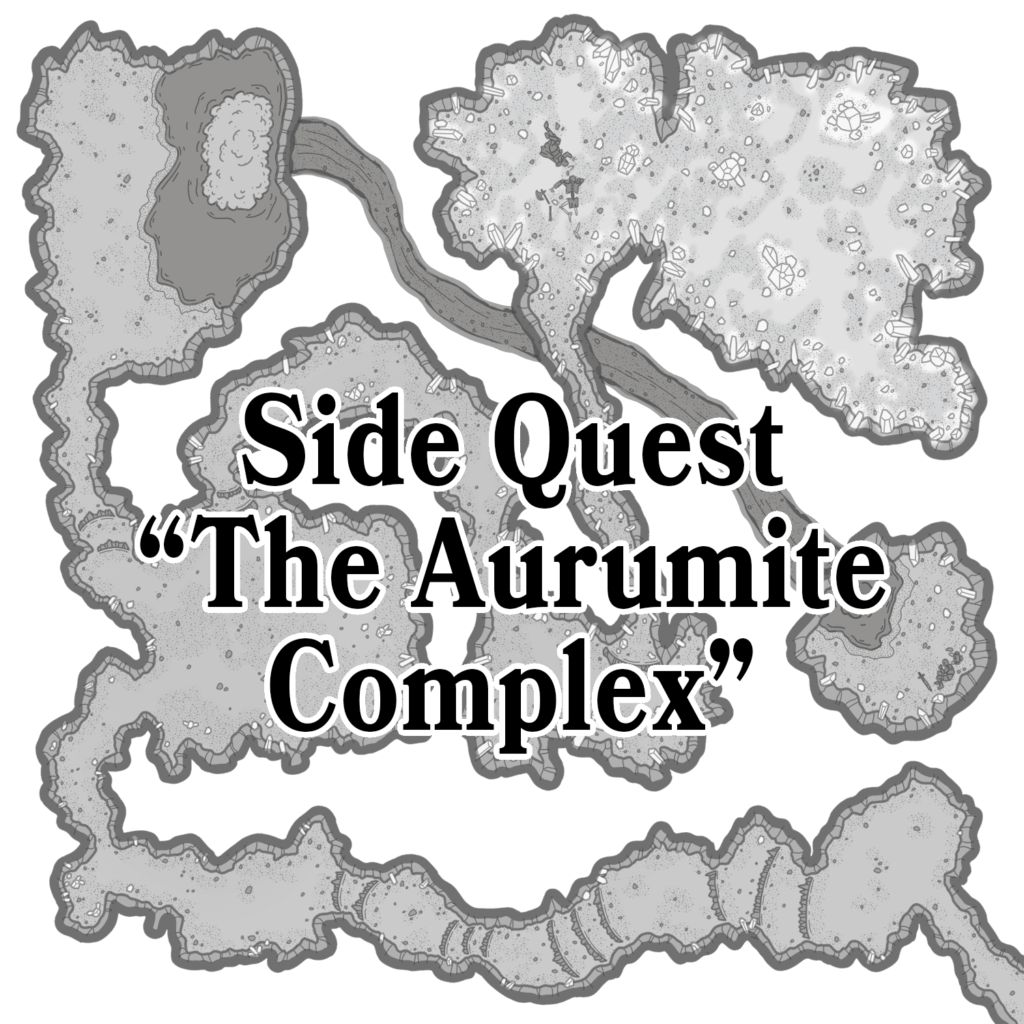
Free D&D One Shot: The Aurumite Complex
Buried deep within the bowels of the earth hides a cavern system filled with a precious crystal unlike any found within the realms. This crystal, known as aurumite, is sought after for its unique uses in arcane practices. A seam was recently located near a farming settlement, and the local authorities requested an adventuring party to clear out the cave. A reward of 1000 gold pieces awaits any who help out the town.
Aurumite is not a naturally occurring mineral. Veins form when small tears from the elemental plane of earth saturate the ground over centuries. This normally results in small pockets of aurumite formations no bigger than a horse cart, but the cave holds a larger, older tear that hosts several escaped creatures from the elemental plane. One such creature is the Aurum giant, an earth elemental that grows in size and intelligence as clusters of crystal emerge from its body. Woe be to any creature foolish enough to harvest crystals within its domain.
Plot Hooks
- The adventurers must collect a sample of aurumite that resides nearest to the elemental portal, which resides within the cave the aurum giant calls home.
- The adventurers aren’t the first party sent to clear the caves, and a friend went missing within the depths.
- A local wizard informs the party of the tear in the material plane and requests that they close it using a mechanical device that disrupts portals.
Encounters
- Aurum Giant – CR 5
- Dust Mephit – CR 1/2
- Flameskull – CR 4
- Will o’ wisps – CR 2
The Aurumite Caves
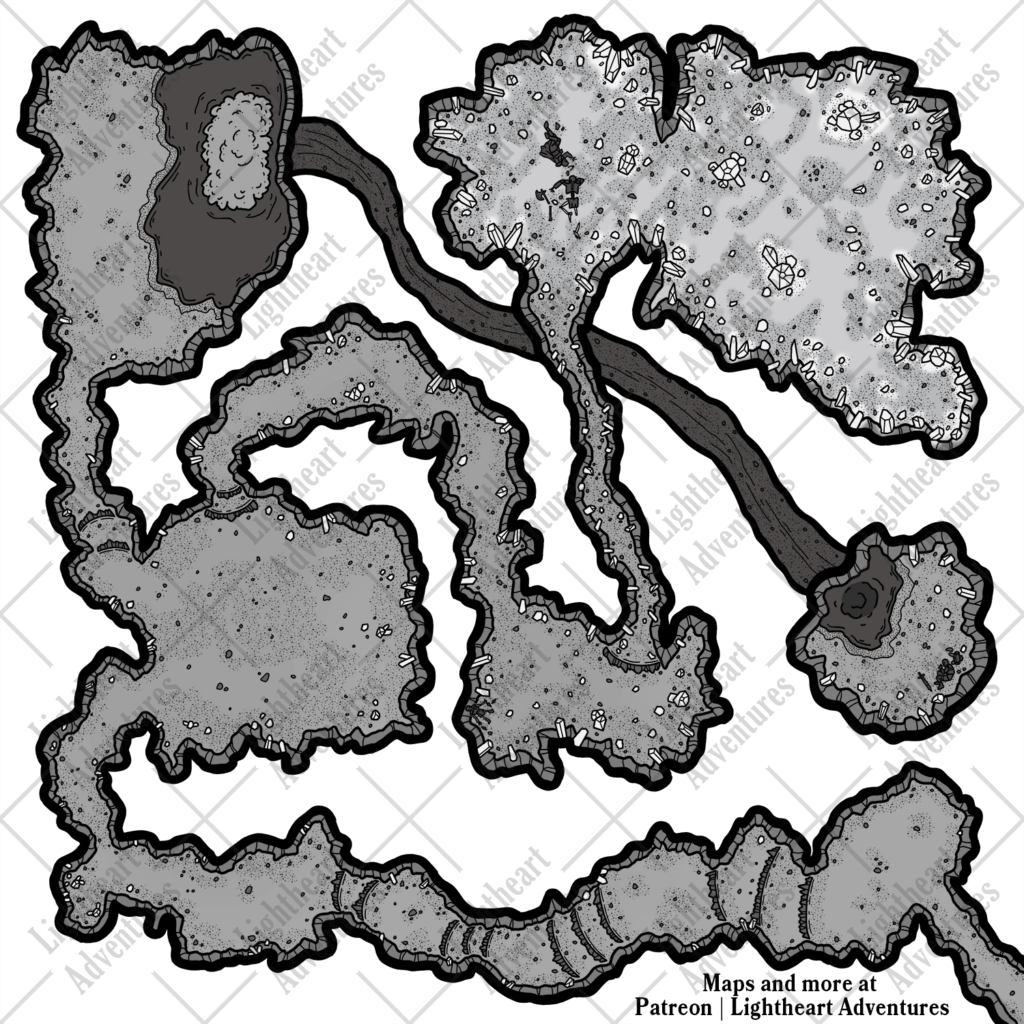
Overview
Gaining Entry
The trek from the farming town to the cave system isn’t arduous but does take one day of travel overland. A large chasm opens in the hillside amid verdant trees and is inconspicuous if not actively searching for it. The chasm walls reach down 60 feet into the earth and end on a small patch of dirt and rock. It is possible to climb down without equipment with a DC 14 Strength (Athletics) check. Failure causes the creature to reach the floor bottom faster than expected (with applicable fall damage). A small crawl space near the back of the hollow is the only access point to the cave system. Medium to Large-sized creatures must crawl on their hands and knees to progress. The crushing tunnel extends 600 feet deeper into the earth before expanding into a larger rocky chamber. Small pale-purplish crystals form within the walls and ceiling, no bigger than an index finger in length and width. A musty odor of wet earth fills the air as the cavern stretches before the adventurers.
General Features
Ceilings within the cave system rarely rise above ten feet, and room sizes vary from chamber to chamber. The ground is a mixture of hard-packed dirt and gravel combined with flat sheets of rock. All rooms are devoid of light except for the Crystal Garden — large aurumite clusters generate enough dim light to bathe the entire chamber in a sickly, pale glow.
C1. Descent
A small landing area sits at the end of the long tunnel, with enough space for a few people to rest if needed. Shallow ledges continue down into the cave to the left. Small mineral formations protrude from the walls, growing in number as the adventurers descend the tunnel. A successful DC 12 Intelligence (Arcana) skill check confirms these crystals are aurumite but are of little value in this state. If the skill roll equals 17 or higher, the adventurers know that lambent crystal formations are the preference for arcane needs, and smaller veins should remain undisturbed to grow over time.
Ledges: Each ledge within the cave system is roughly 3 to 4 feet high and cost no additional movement when descending. However, it takes 5 feet of movement to climb up on a ledge if not using climbing aids.
C2. Main Hall
The ceiling opens to fifteen feet tall in the most cavernous room yet. Two tunnels split ahead: the left-most tunnel descends deeper, while the right one rises. The sound of falling water is audible from the left tunnel. More crystals grow within the walls, though these are too small to be of any value. Mixed in with the dirt and gravel are small bones of cave animals long dead, and an errant humanoid skull peeks from behind a pile of stones.
Encounter: Passing through this room draws the attention of 3 to 4 will-o’-wisps. These spirits belong to the team of deceased adventurers that came through the cave system long before. Souls remain on the physical plane when close to large formations of aurumite due to an unexplored magical property. Spectral reflections of the adventurer’s former selves flash for an instant when a wisp is slain. These include:
- A beautiful elven cleric of a wilderness deity
- A dour dwarf rogue with a pure white beard
- A regal half-orc barbarian missing their right eye
- An older human knight wearing armor bearing a nearby kingdom’s insignia.
C3. Waterfall
The sound of crashing water grows as the adventurers walk the wet cavern floor. Water pours from a crack in the cave ceiling about fifteen feet overhead into a pool at the right side of the room. There are few aurumite crystal formations within this chamber.
Hidden tunnel: Searching the pool requires a successful DC 13 Wisdom (Perception) check to notice a narrow hole in the pool floor beneath the waterfall. The hole is wide enough that a medium-sized creature or smaller can swim into it, though it might be a little tight for larger creatures. The pressure from the waterfall aids in swimming downstream.
C4. Grotto
This room waits at the end of an 80 ft. long submerged tunnel. The water rests just below the sandy shore, and excess water filters through cracks within the pool. Upon the cavern floor lies the desiccated body of an adventurer. They wear rust-stained scale mail armor, while beside them is a longsword in a scabbard and a pristine-looking backpack. Any adventurers investigating the body notice a rusty kingdom insignia on a DC 12 Intelligence (Investigation) check.
Treasure: The sword lying in the dirt is a flame tongue longsword. The backpack is a bag of stasis (see appendix), and is made of high-quality leather and is stitched with silver thread. The side pockets contain three gems worth 50 gold each and the contents of a dungeoneer’s pack, minus the rations. Flipping open the top pouch reveals a battered human skull surrounded by intricate arcane weaving. A successful DC 16 Intelligence (Arcana) check reveals that the inner lining negates magical effects on items placed within the bag.
Encounter: If the skull is removed from the bag of stasis, green fire bursts from its eye sockets as it animates into a Flameskull. The floating skull immediately attacks the nearest creature and fights to the death. A creature can attempt to grab the animated skull out of the air and place it back within the pouch, rendering its magic inert.
Upstream: While the downstream flow aided in arriving at the chamber, swimming upstream is a more difficult situation. Any creatures without a swim speed must succeed on a DC 15 Strength (Athletics) check to swim their way back to the waterfall chamber. Failure pushes the creature back to the pool.
C5. Stalactite Chamber
Aurumite formations grow in number as the adventurers continue on. The tunnel dog-legs into a new chamber occupied by multiple standing aurumite clusters on the floor and hanging from the ceiling. The corpse of a long-dead adventurer dressed in leathers sits in a corner alcove. Massive growths of aurumite consume the space where the corpse’s head would be. A successful DC 16 Wisdom (Medicine) check reveals that this was once a dwarf slain by a spike of aurumite piercing their helmet. Searching the body reveals three rusted daggers, a set of thieves’ tools, and a leather pouch containing 75 gold and 43 silver pieces. Dim light is visible from the tunnel leading deeper within the cavern.
Falling hazards: Any loud noises in this room cause aurumite spikes to fall from the ceiling. Creatures must succeed on a DC 14 Dexterity saving throw or take 2d6 piercing damage.
Narrow passage: The cave tunnel severely narrows for 40 ft. ahead. Small creatures can pass through with little effort, but larger creatures must proceed with caution or risk cutting themselves on sharp crystals. Each medium-sized or larger creature passing through must make a DC 13 Strength (Athletics) or Dexterity (Acrobatics) skill check. Failure causes the creature to take 1d6 piercing damage.
C6. Crystal Garden
The narrow passage opens up into the largest room in the entire cave system, with a ceiling reaching 30 feet high. The largest aurumite growths reside within this chamber due to its proximity to the portal leading to the elemental plane of Earth. Light gleams from the massive crystals — formations larger than a wine barrel grow from the earth above and below. Adventurers versed in stone-craft notice the weakened ceiling on a successful DC 14 Wisdom (Perception) check. Two corpses belonging to adventurers lie on the floor near the entrance.
Corpses: The corpses of two humanoids lie on the ground just inside the room. One appears dressed in skins and furs while the other is in intricate chainmail. A DC 16 Wisdom (Medicine) check reveals that both of these people were crushed to death. Searching their bodies reveals a potion of healing and an arcane focus made of holly on the armored corpse and an ivory carving of a raven worth 100 gold on the unarmored corpse.
Encounter: The Aurum giant rests at the back of the garden, flanked by two dust mephits. It mostly ignores their incessant whining and guards the portal against invaders. If it detects any non-elemental plane of earth creatures, it waits until they move within range and hurls a crystal shard before engaging. The mephits try to flank and blind interlopers. The giant will stop attacking if any interlopers speak terran to it, but will only cease its attack if the adventurers agree to leave. It can be persuaded to allow some crystals to be mined on a DC 20 Charisma (Persuasion) check. If reduced to less than half health, the aurum giant moves over to the portal (P) and spends two actions to break the walls to cause a cave-in.
Cave-in: Aurumite is a fragile mineral, and since the entire chamber is filled with the crystal, it makes for a potential hazard. The ceiling begins to collapse if the walls take more than 25 points of damage or if loud spells (such as fireball, shatter, or thunderwave) are used more than once. Any creatures that remain in the room must succeed on a DC 14 Dexterity saving throw– otherwise, they suffer 2d6 bludgeoning damage from falling rocks. Each round that a creature remains within the collapsing room after the initial save must make a second DC 14 Dexterity save or risk becoming buried by the rubble. Buried creatures become restrained and take 1d6 bludgeoning damage each round they are buried. A buried creature can attempt to free itself with a DC 20 Strength (Athletics) check or an ally can use an action to free them. The crystal garden (C6), the stalactite chamber (C5), main hall (C2), and the descent (C1) all begin to collapse over the course of 6 rounds.
Treasure: Roughly 2500 GP in raw aurumite can be harvested from the cavern walls.
Elemental Portal [P]: A tear in space hovers a foot above the cave floor and seamlessly merges with the stone wall. Creatures not native to the earth plane feel a sub-audible vibration in their body the closer they get to the portal. Any creature attempting to cross the portal must succeed on a DC 16 Constitution saving throw or suffer 2d10 force damage on a failure or half as much on a success as their body is violently vaulted into the plane. Those who survive the teleportation will find themselves in a lightless rock corridor that spans miles in two opposite directions.
Epilogue
- The adventurers are paid the full 1000 gp plus an additional purse of 200 gp for a bonus if the cave is cleared of all danger and accessible.
- The reward is cut in half due to excavation costs if the cave is blocked by cave-in.
- An enchanter might purchase the Flameskull for a high amount if it remains within the bag of stasis.
- The lord of a nearby kingdom would pay a handsome reward for news of the errant knight and his companions found within the cave.
Appendix - NPCs
All the stats for the following monsters can be found in the Monster Manual:
- Flameskull – p.134
- Dust mephit – p. 215
- Will-o’-wisp – p. 301
Aurum Giant
- Large elemental, neutral
- Armor Class: 17 (natural armor)
- Hit Points: 137 (13d10 + 72)
- Speed: 30 ft., burrow 20 ft.
- STR: 19 (+4)
- DEX: 10 (+0)
- CON: 22 (+6)
- INT: 8 (-1)
- WIS: 9 (-1)
- CHA: 5 (-3)
- Vulnerabilities: Thunder
- Damage Resistance: Bludgeoning, Piercing, and Slashing From Non-magical Attacks
- Damage Immunities: Poison
- Condition Immunities: Exhaustion, Paralyzed, Petrified, Poisoned, Unconscious
- Senses: Darkvision 60 Ft., Tremorsense 60 Ft., passive Perception 9
- Languages: Terran
- Challenge: 5 (1,800 XP)
False appearance. While the aurum giant remains motionless, it is indistinguishable from an inanimate crystal formation.
Earth glide. The aurum giant can burrow through nonmagical, unworked earth and stone. While doing so, the aurum giant doesn’t disturb the material it moves through.
Shatter. When the aurum giant is reduced to 0 hit points, it shatters in an explosion of rock fragments. Each creature within 10 ft. of it must make a DC 15 Dexterity saving throw, taking 16 (4d8) piercing damage on a failed save or half as much on a successful save.
Actions
Multitattack. The aurum giant makes two slam attacks.
Slam. Melee Weapon Attack: +7 to hit, reach 10 ft., one target. Hit: 13 (2d8 +4) bludgeoning damage.
Hurl Crystal Shard (Recharge 5-6). The aurum giant tears a chunk of crystal from its body and hurls it at one target within 60 ft. The target must make a DC 15 Dexterity saving throw. On a failure, the target takes 16 (3d8 + 4) piercing damage or no damage on a success. All creatures within 5ft. of the target must succeed on a DC 14 Dexterity saving throw or take 1d8 piercing damage.
Appendix - Magic Items
Bag of Stasis
Wondrous item, uncommon
This ornate bag temporarily dispels the effects of “unruly” magical or cursed items placed within. Any magical items or tiny creatures animated by magic placed within the bag become inert and act as non-magical objects of the same kind. If the item or creature is removed from the bag their magic returns within moments. The bag will cease to function if pierced or destroyed.
We hope you enjoyed this free D&D One Shot! From here it’s up to you to decide if you want to create a deeper story arc involving the crystals, the remains you found within the cave, or anything else you enjoyed about this encounter. We would love to know if you use this Side Quest, so please drop a comment here on the blog, on Twitter, Facebook, Instagram, or Discord to let us know how it went! If you want a printable PDF version of this Side Quest, it is available (along with our other Side Quests, maps, and more fun things) exclusively on Patreon. Lastly, if you enjoyed this adventure, consider checking out our longer campaigns and map packets on our Shop page or grab another free D&D map on our Side Quests page.
Happy Side Questing!


Hola, he creado un mapa de la cueva que quería dejar a la disposición de otros usuarios. esta un poco modificado / distinto al original, pero quizas le sirva a alguien como opción adicional 🙂 Me gusto mucho el Oneshot y lamente no poder encontrar ningún mapa detallado. pero claro, tampoco iba a subir esto a internet sin preguntar o avisar antes a los creadores deloneshot, asique, si os gusta, todo vuestro.
Os dejo el enlace:
https://ibb.co/4P5Zz0t
As a DM running a last minute game tonight from this adventure, I thank you!
Oh, that’s great! How did it go?
We played and enjoyed it as a One-shot!
I can’t believe one of my players actually spoke Terran and rolled a 20 on persuasion!?
That was fun.
The main downsides:
– What Animals/human remains were in the entrance hall and how did they die?
– How did the guy in the waterfall die? And why was he dissected? There is no one else there.
– What is the point of the flame skull? Why would a random party carry it in there and why would it attack the party if they freed it?
I/we still really enjoyed it but got stuck when the players started asking the more serious questions.