I’m back with another simple random dungeon for September’s Design-A-Dungeon Challenge! The rules are basically the same – consult the random dungeon generator in the Dungeon Master’s Guide and make a map out of it. To make things simple, I limit myself to a 10×6 page, and if a room or passage doesn’t make sense when writing the encounter, I’ll axe it. Anyways, I hope you enjoy this week’s map!
As usual, this map and its contents will be available on the site, but our Patrons receive multiple versions of the map, plus a downloadable PDF version of the content.
Disclaimer: This post contains affiliate links, meaning we may receive a small commission from qualifying purchases if you click on our links, at no additional cost to you. As Amazon affiliates, we may earn from qualifying purchases. You can see our full disclosure here. Thanks for supporting your favorite dungeon artists!
Reference Resources Needed
Simple Random Dungeon -- Design-A-Dungeon
Dice rolls
Much like last time, I start off by rolling for the theme of the dungeon. This map theme got a 9, meaning we’re making a Treasure vault! Our first room is a massive 80 ft. by 20 ft. hall with two doors at the long ends, and two open hallways in the north and south. Unlike last time though, I decided ahead of time how many rooms I wanted to draw, rather than keep going until I ran out of room. I ended up with 9 rooms total, alongside their purpose.
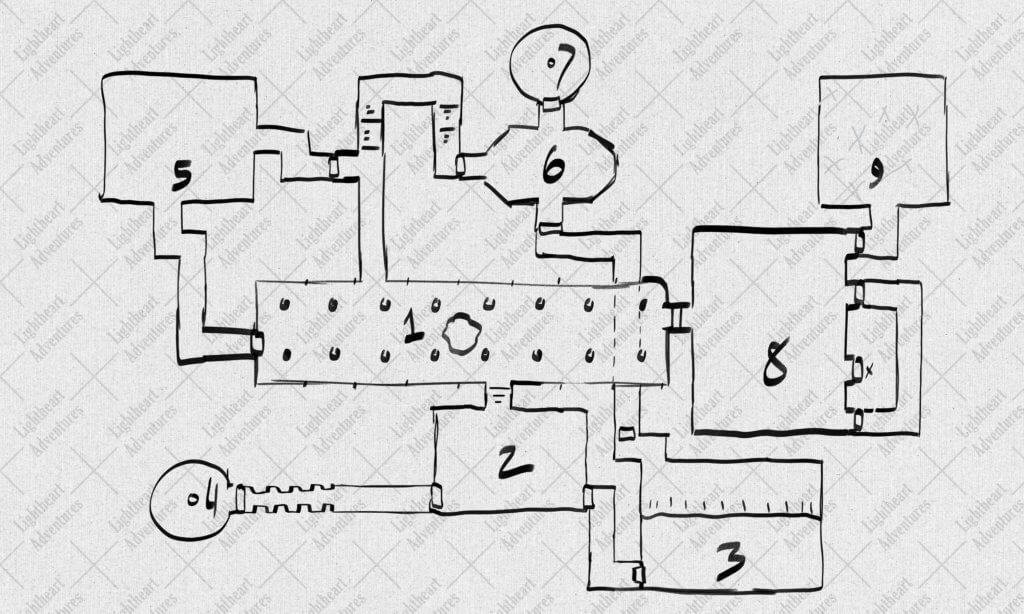
Seeing these rooms together with their functions put me in mind of a buried library infiltrated (and reoccupied) by a sect of kuo-toa and their archpriest. What kind of shenanigans are they getting to in there? Let’s find out together with….
Forbidden Knowledge!
A short dungeon encounter for 5th level adventurers
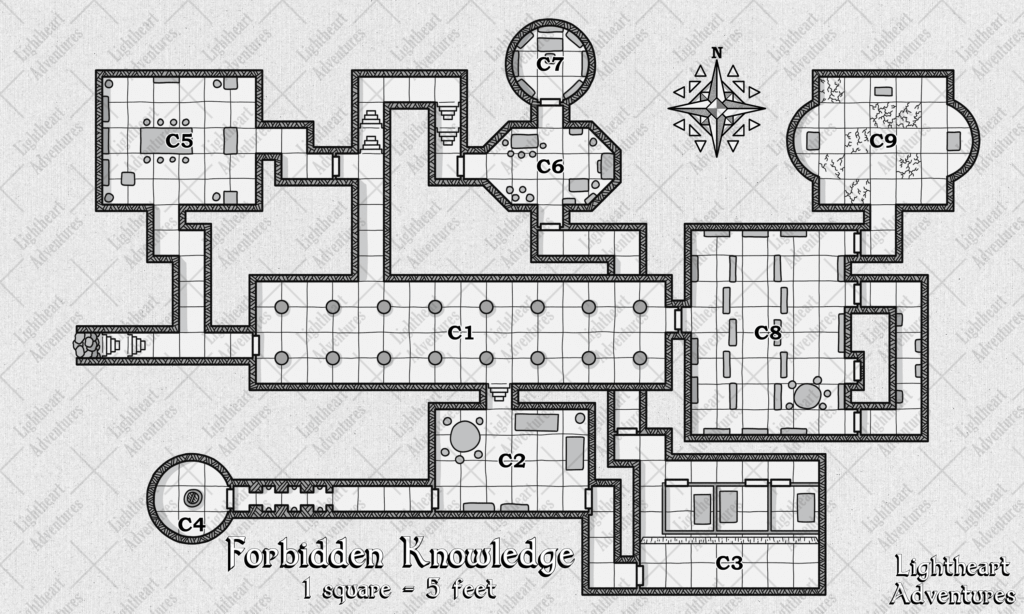
Chamber One (C1):
Rubble drops down from the hole in the ceiling as ropes trail down to the stone floor below. Pillars line the massive hallway, and the sounds of muffled merriment can be heard coming from the south.
- The hall is initially devoid of life, though small tracks are visible in the dust.
- The hallway to the north descends 20 ft before ending at a locked metal door.
- The solid metal door to the east is heavily locked, requiring a key or a DC 24 Dexterity check using thieves’ tools.
Chamber Two (C2):
Furniture made of crude material fills this room, as well as a handful of short, fish-like creatures that gurgle in a language that is more saltwater than syllables.
- Five kuo-toa and one kuo-toa whip reside in this room. They are distracted from most noises and have a -5 to their passive perception.
- Searching the cabinets against the southern wall reveals a handful of dried fish that act as rations.
- Both doors are unlocked.
The whip holds a key to open the cells in C3.
Chamber Three (C3):
This chamber is split into two levels: an upper loft that sits 20 feet above three crude metal cages on the floor below. Two cages contain naught but rags and debris, while the third furthest on the eastern wall holds a sitting figure.
- Two kuo-toa stand guard outside the cages on the lower level while one kuo-toa stands on the ledge above.
- The cages are locked but are opened with a key or with a DC 14 Dexterity check using thieves’ tools.
- The third cage holds an unarmed drow spy sent to investigate the structure. They are wary of strangers and will attempt to escape if given the chance. They know about the inner library and the book golem that guards it.
- The metal door to the north is locked, but may be opened with the whip’s key or unlocked with a DC 15 Dexterity check using thieves’ tools.
- A pile of rubble within the western cage hides a small pouch holding 35 gold pieces.
Chamber Four (C4):
The walls narrow several times before reaching an unlocked door which leads to a near-empty circular chamber with a stone well directly in the center. The sound of splashing emanates up from the bottom of the well.
- There is a 1 in 4 chance that a small group of 2-3 kuo-toa climbs up out of the well as the adventurers enter.
- Descending down into the well takes the adventures to a spacious water-filled cavern that leads further into the Underdark (and out of this adventure).
Chamber Five (C5):
Opulent tapestries hang from the walls of this once grand dining chamber. A large oak table set for eight sits in the middle, though a layer of dust covers everything in the room.
- The ghost of an elven servant haunts this room and throws sharpened knives at intruders.
- Searching through the cabinets yields a handful of polished silverware pieces worth a grand total of 50 gold pieces.
Chamber Six (C6):
Warm and malodorous aroma fills this odd-shaped room, coming from the active oven in the eastern wall. A layer of slime coats the floor, making movement through this chamber tricky.
- Four kuo-toa maintain this kitchen space and prep food for the archpriest and the others.
- The slimy floor is considered difficult terrain for anyone aside from the kuo-toa.
- Barrels and crates hold spoiled kitchen goods, but a small keg contains spices worth 50 gp.
Chamber Seven (C7):
Bookshelves filled with alchemical trinkets line this circular chamber, while a stately desk resides in the center. Smoke rises from an incense stick that never seems to diminish.
- A kuo-toa archpriest sits at the desk deep in thought while his invisible imp familiar crouches on the shelves nearby.
- The archpriest holds a key to unlock the door leading to the grand library (C8).
- Looting the room yields a slew of information, including four books worth 100 gp each and a crystal orb worth 50 gp.
- There’s a 50/50 chance that the archpriest is consulting the spectator in C9. A spare key to the locked door can be found within the desk.
Chamber Eight (C8):
Organized shelves of books fill the massive space. Many tomes long thought to be lost, a veritable king’s ransom worth of forgotten knowledge.
- Disturbing the shelves causes a flurry of books to form into the shape of a massive hard-back golem (Flesh golem) that attacks all creatures in the room.
- Searching the room reveals ten valuable books worth 100 gp each.
- Two doors in the eastern wall lead to a connected hall filled with book-binding supplies and two annoyed crawling claws.
- Another door leads nowhere, and attempting to turn the handle causes the creature to suffer 1d8 lightning damage.
Chamber Nine (C9):
The doorway opens into a darkened chamber with a tall ceiling. Three chests sit on the stone floor to the north, west, and east.
- A spectator floats far above in the gloom, waiting to get the drop on any interlopers. If the archpriest is in the room, the two of them are conversing.
- Sections of the stone floor are weakened, and any weight put on top causes them to crumble and fall into a 10 ft. deep spike trap pit.
- The three chests hold a contained total of 2500 sp and 1500 gp, as well as a carved ivory drinking horn inlaid with silver worth 250 gp, an ebony dice set inlaid with copper worth 250 gp, and an ebony ring set with jasper worth 250 gp.
Wrap up
And that brings us to the end of this whirlwind dungeon adventurer! I’m having a ton of fun with this format, and it’s a nice alternative to heavily drawn-out (pardon the pun) dungeon maps.
We would love to know what you and your party thought of our simple random dungeon encounter, so please drop a comment here on the blog, on Twitter, Facebook, Instagram, or Discord to let us know how it went! If you’d like access to more maps and content, including downloadable PDFs of our adventures, check out our Patreon. We’re able to do what we do because of all our amazing Patrons!