I get asked frequently how I come up with dungeons for my Side Quests and other projects. Most of the time I have a specific challenge or encounter in mind and I sketch a map layout to see what works. Sometimes though, if I get stuck or need ideas, I use the Random Dungeon appendix in the Dungeon Master’s Guide, but I’ve never used it to make a random dungeon map from scratch…
…until now!
For this week’s post, I wanted to see how a (mostly) random dungeon map compares to other ones I’ve drawn. With that in mind, let’s go ahead and get right into the first (of hopefully many) Design-A-Dungeon challenge!
Since I’m trying something new, this map and its contents will be available on the site, but our Patrons receive multiple versions of the map, plus a downloadable PDF version of the content.
Disclaimer: This post contains affiliate links, meaning we may receive a small commission from qualifying purchases if you click on our links, at no additional cost to you. As Amazon affiliates, we may earn from qualifying purchases. You can see our full disclosure here. Thanks for supporting your favorite dungeon artists!
Reference Resources Needed
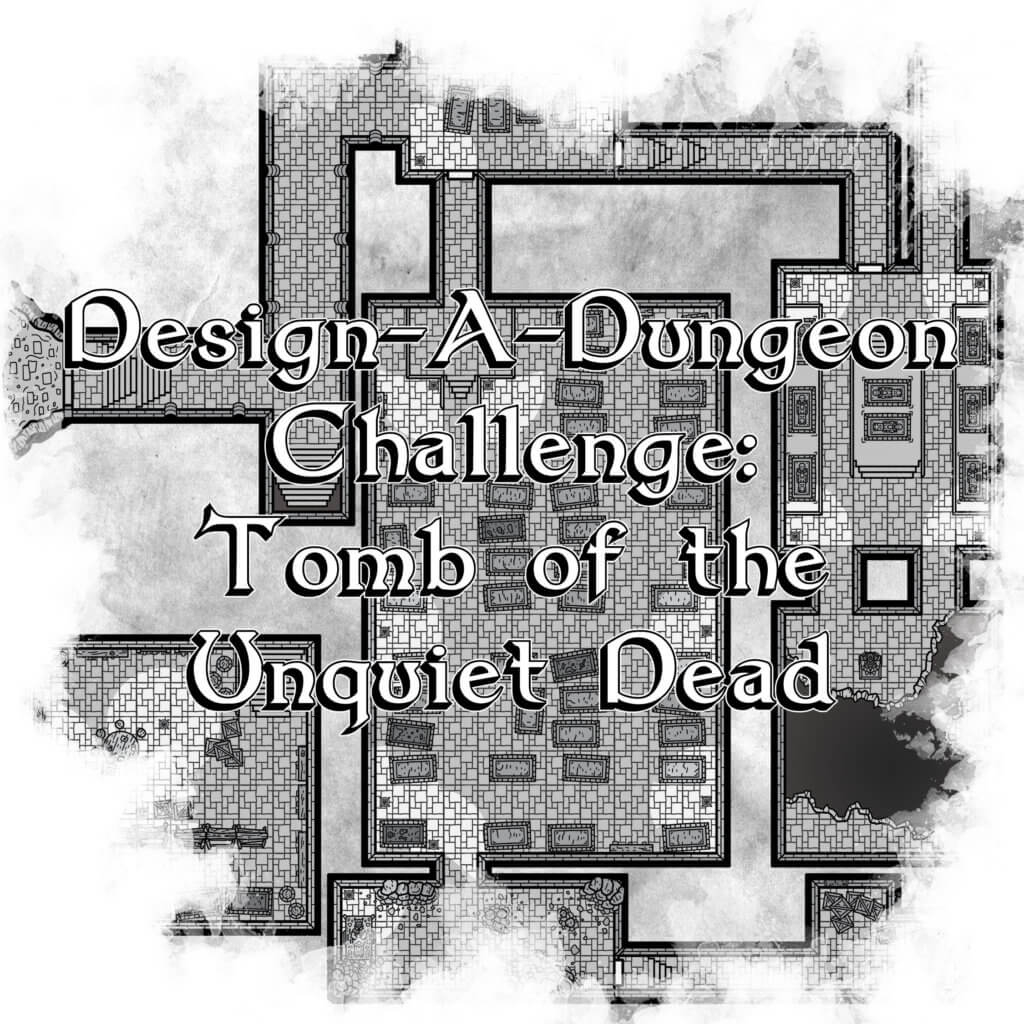
Random Dungeon Map -- Design-A-Dungeon
Dice rolls
First things first is to randomize what kind of dungeon we’re making. Pg. 292 through 295 has a section titled “Chamber purposes”, which fits our need, complete with a corresponding decoration table. Our options include:
- d1. Death trap
- d2. Lair
- d3. Maze
- d4. Mine
- d5. Planar gate
- d6. Stronghold
- d7. Temple/Shrine
- d8. Tomb
- d9. Treasure vault
- d10. Cartographer’s choice
(there are only nine options in the book, so I’m adding the last one)
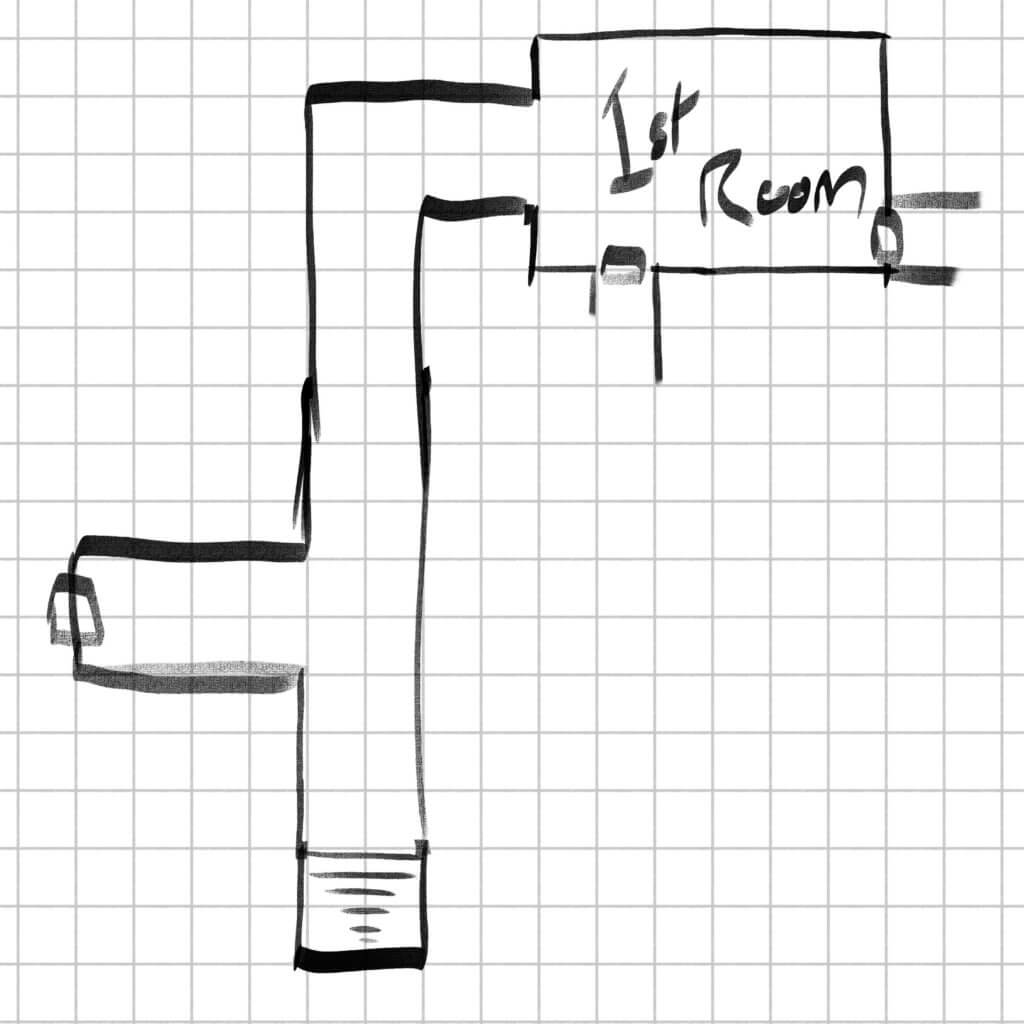
I rolled an “8” on our table, so I’ve got a tomb to work with! I like to keep my maps on the small size, but for this I decided a bigger canvas would work better since the generator favors bigger rooms and longer corridors. Starting off with the entrance I rolled a “9”, indicating a 10 ft. wide T-shaped intersection, already off to a good start. After a few more rolls, I got a nice little split with stairs to a lower level, and a chamber with two doors. Thanks to a “7”, the first chamber is a “crypt for less important burials”. Let’s keep going!
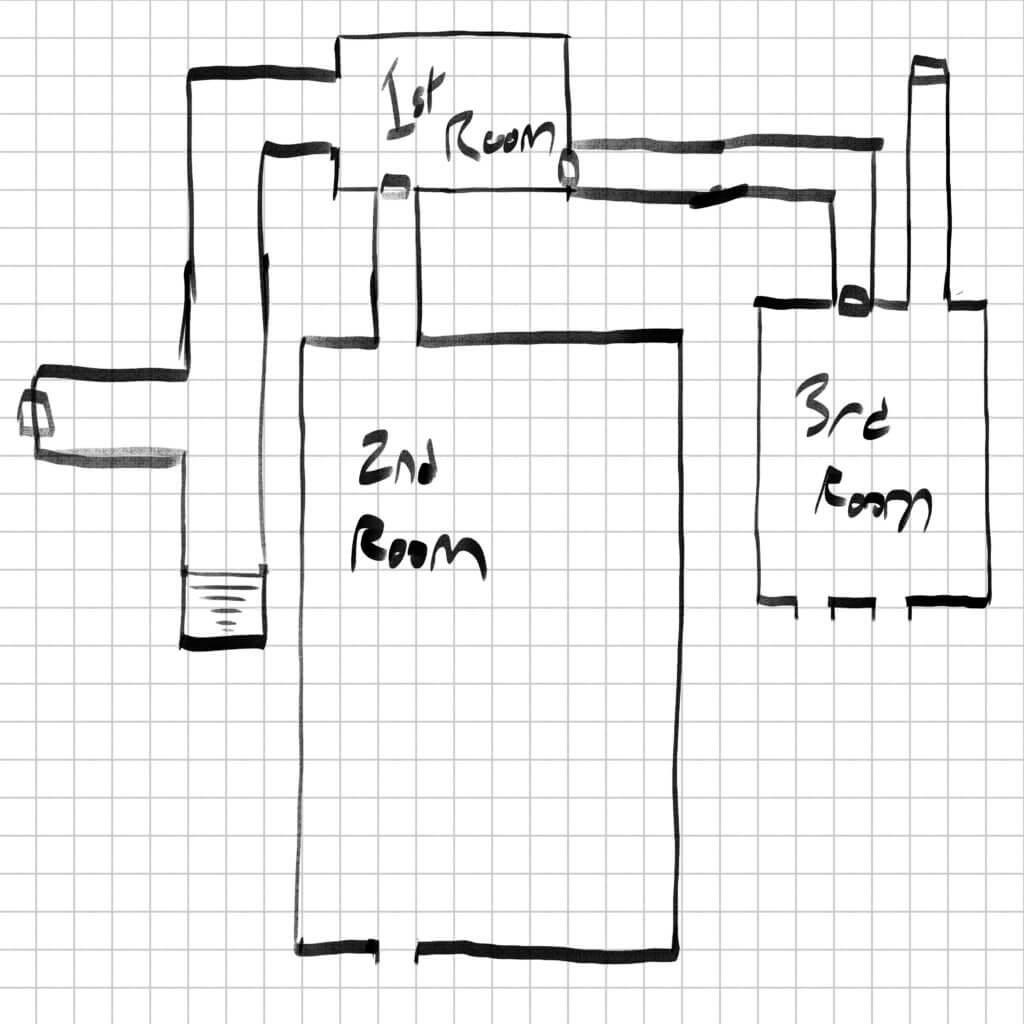
The dice gods must have been pleased with me so far, as they felt fit to bestow upon me an utterly MASSIVE 50ft. by 80ft. rectangle for even less-important dead. I made a mental note to make this one seem more like a room overflowing with tombs. Our side passage from the first chamber rolled to extend far past the edge of the canvas, so I made the executive decision to add in a corner and keep things going in the right direction. For our third chamber we have a smaller rectangular room for the wealthy dead, plus a northern passageway that ends at a trapped false door. The DMG even has a table to determine the kind of traps one can have, and behind the false door lingers a nasty patch of yellow mold.
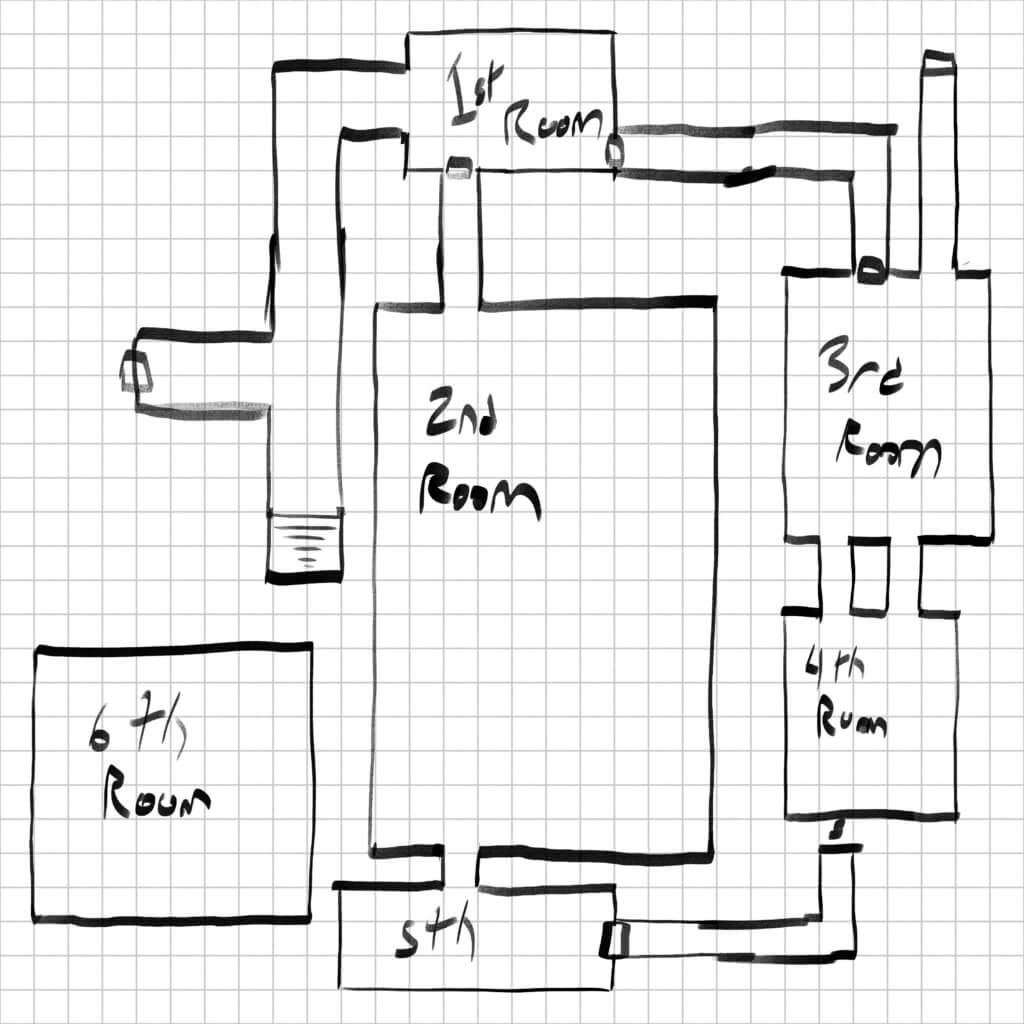
For the last few chambers, we got a chapel dedicated to a deity that is split in half from a chasm, and a narrow rectangle acting as a false tomb filled with debris. Neither of these rooms had exits, so I added a small L-shaped room with a secret door, because I love secret doors. Last but not least, the 6th chamber at the base of the stairs was once a warehouse for the tomb, but now acts as a guardhouse. With our final sketch, we’ve got ourselves the start of a dungeon!
After a few creative alterations, I’m happy to present…
The Tomb of the Unquiet Dead!
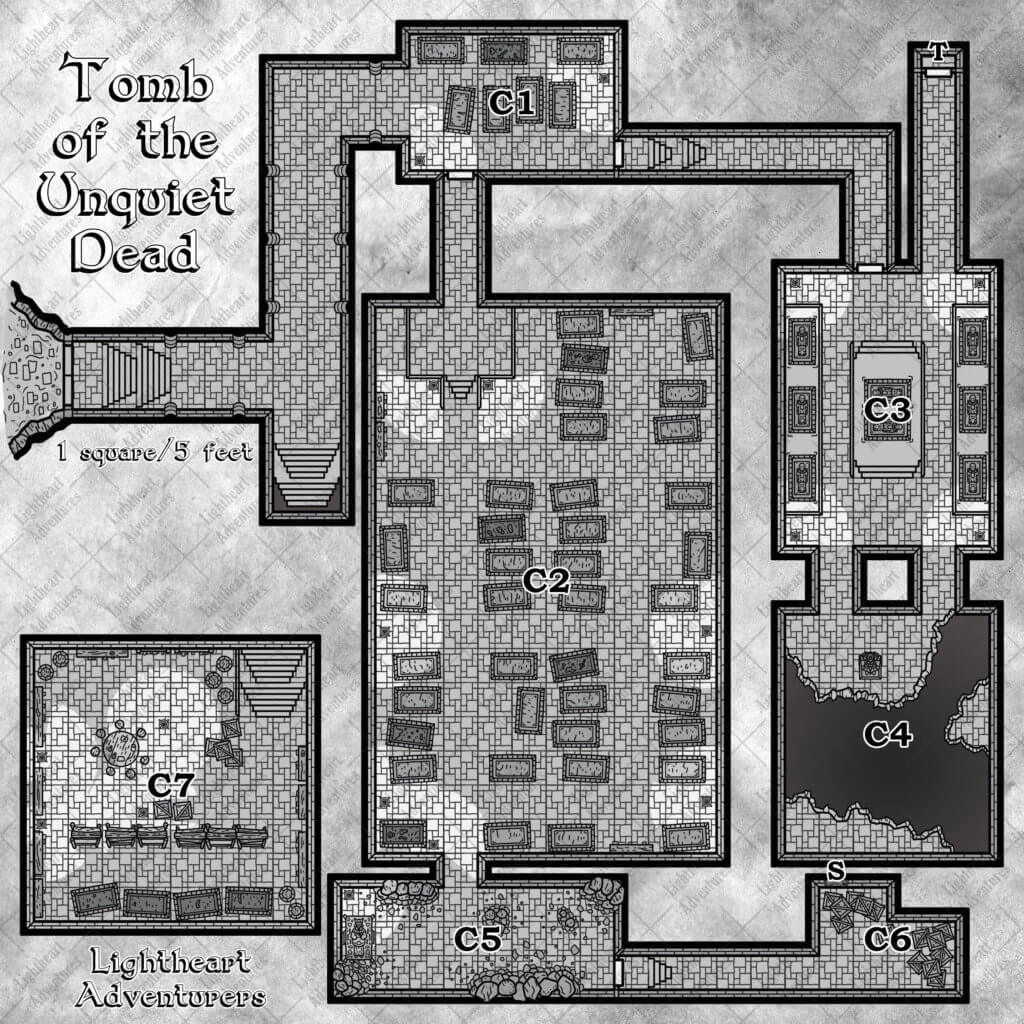
Chamber One:
Dust covers the low-quality stone coffins. Footprints in the grime and shuffling noises come from behind the furthest casket.
- A wight hides unsuccessfully, trying to find a key.
- The metal-reinforced wood door to the south is unlocked, while the metal portcullis to the east is locked.
- Two lit floor torches provide illumination.
- Inside one coffin is a pouch containing one small ruby worth 50 gold pieces, plus an additional 37 silver pieces
Chamber Two:
A massive chamber filled with more paltry coffins, with alcoves within the walls stacking up to the ceiling.
- Eight zombies meander aimlessly among the coffins.
- Opening most coffins reveal a paltry trinket or treasure (1 to 5 gold), but one coffin in the north east holds a platinum talisman worth 250 gp. This coffin is also trapped with contact poison (DC 14 Con Save, 3d8 poison dmg) along the underside of the lid.
Chamber Three:
Gilded coffins sit upon raised daises. Two hallways lead to the south, while the northern hall leads to a closed metal-reinforced wood door.
- Each of the coffins are empty, though scraping the gold leaf from the tops yields 20 gp for each hour’s work.
- The northern door is unlocked, though immediately behind it is a large patch of deadly yellow mold.
Chamber Four:
A massive chasm splits this room from west to east. A mortuary deity stands before the pit in quiet observance.
- The pit is 60 feet deep.
- Searching the statue reveals a key to the locked iron portcullis.
Chamber Five:
Dirt and small rocks shift ominously from the ceiling within this chamber. A single heavily-ornamented coffin lies half-buried in debris.
- The tomb is unlocked and untrapped, however inside is a patch of yellow mold covering a painted glass puzzle box worth 200 gp and a stone of good luck.
- Loud noises within this room causes parts of the ceiling to collapse (DC 14 Dex save, 2d6 bludgeoning damage).
- The western door is unlocked and untrapped.
Chamber Six:
Rough stairs lead down to a small storage chamber filled with crates. Each one appears to be ruined by moisture within the room.
- There is little of value within the crates
- A secret door hides on the northern wall behind the crates. It opens easily if pushed, and leads to chamber four.
Chamber Seven:
A room once dedicated to preparing the dead now serves as a guardroom. Old embalming supplies and unused coffins mingle with weapon racks and barrels of ale.
- Three cultists and two guards sit around the table, drinking.
- Searching the supplies yields one flask of acid, a component pouch, and enough food and drink to last a group of four twenty days.
Wrap up
It was fun to let the dice decide what kind of random dungeon map to draw, and I think this is something I’m going to continue to do every so often! I may even add in some of my own tables to expand the dungeon options!
We would love to know what you and your party thought of our random dungeon map challenge, so please drop a comment here on the blog, on Twitter, Facebook, Instagram, or Discord to let us know how it went! If you’d like access to more maps and content, including downloadable PDFs of our adventures, check out our Patreon. We’re able to do what we do because of all our amazing Patrons!