Dragons are so hot right now thanks to the release of the newest D&D book “Fizban’s Treasury of Dragons”. It’s surprising to see how much lore and content was waiting to be mined and published to really flesh out ½ of D&D’s namesake. I’m barely halfway through (review coming soon), but I’m already getting tons of campaign ideas to take dragon encounters to the next level! With that said, I think this is the perfect time to have a free Fizban’s dragon adventure that focuses on our scaly friends.
For those of you who are new to our blog, Welcome! We post a monthly Side Quest, which are short, free TTRPG encounters with corresponding maps that can be easily threaded into an ongoing or one shot campaign, allowing busy DMs to throw in a random encounter at the drop of a hat. Our Adventurer Level 2 tier allows our Patrons to pick the game system, theme, and name a character or two in an upcoming Side Quest. We create a free adventure around their idea, and now everyone gets to enjoy this free D&D one-shot! Plus, Patrons receive a downloadable version of all our Side Quests.
Disclaimer: This post contains affiliate links, meaning we may receive a small commission from qualifying purchases if you click on our links, at no additional cost to you. As Amazon affiliates, we may earn from qualifying purchases. You can see our full disclosure here. Thanks for supporting your favorite dungeon artists!
Reference Resources Needed
Tea Spotlight: Pumpkin Chai
A fall favorite meets the iconic Indian comfort beverage! This chai blend from Friday Afternoon tea is the perfect drink for a chilly autumnal day (or night). This tea mix is nearing the end of its availability, so hop on over to Friday’s shop and grab a bag before it’s gone. Don’t forget to use our promo code LIGHTHEARTADV to receive 10% off on online orders!

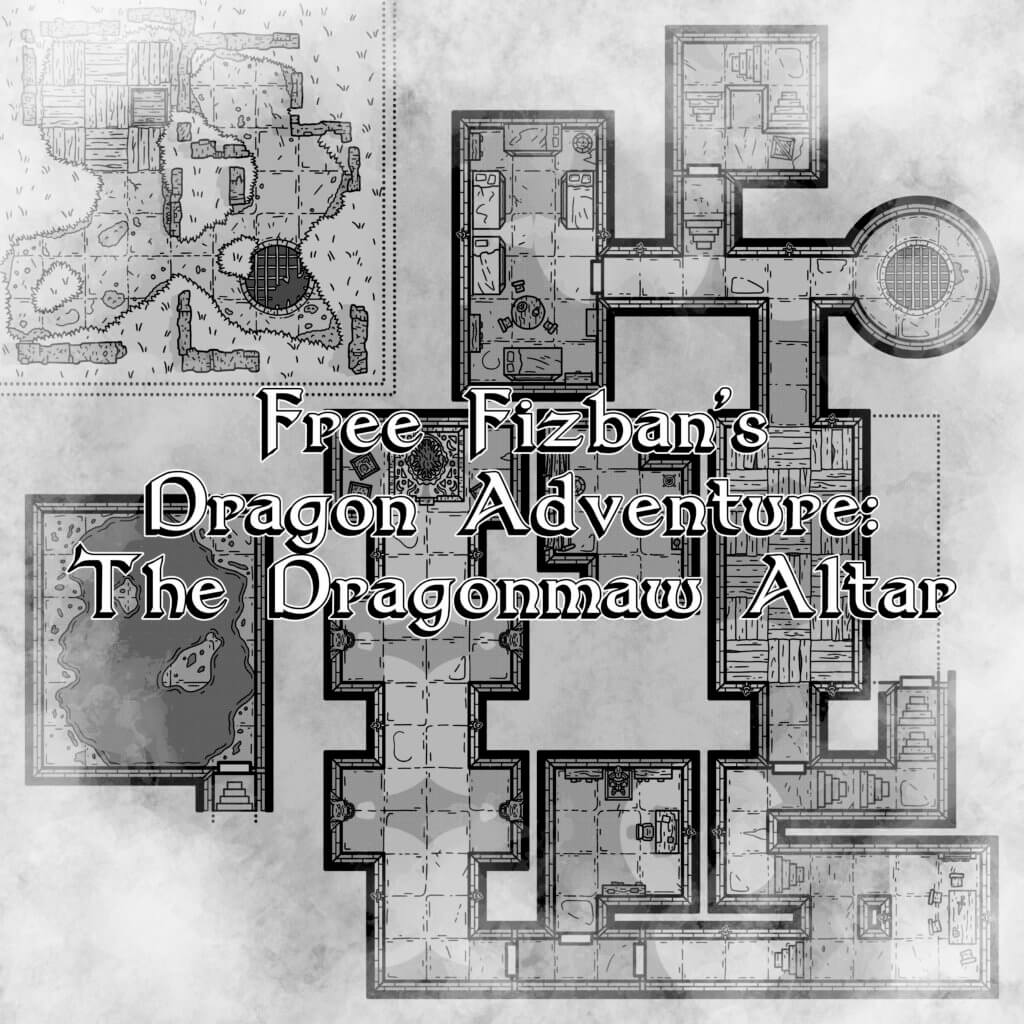
Free Fizban’s Dragon adventure: The Dragonmaw Altar
A Side Quest for 4th Level adventurers
Background
Strange storms without rain or wind and other unusual weather strikes the region near the site of an old fort. Upon investigation, the adventurers discover a distraught adult amethyst dragon named Aunarthalkalah, whose rage is causing these storms. The dragon relocated to this land in preparation for laying a clutch of eggs. However, once the eggs were produced, the followers of a rival dragon kidnapped the unborn wyrmlings to conduct foul experiments on them. As the egg-thieves are under the magical protection of another dragon, Aunarthalkalah is unable to rescue her eggs. She begs the adventurers to find her eggs and bring them back to her. As a reward, she offers a magical garment from her transplanted hoard.
Plot Hooks
- A weary traveler approaches the adventurers (Aunarthalkalah, in disguise) and humbly requests that they find the source of the disturbance in a nearby ruined garrison.
- A dragon ally of the adventurers learns of Aunarthalkalah’s predicament, and sends them to intercede on their behalf.
- The unusual storms are beginning to catch the attention of a powerful mage, who hires the adventurers to investigate the cause.
Tarma Garrison Overview
The ruins of Tarma Garrison lie in the overgrown grasslands far from the borders of civilization. While once it was the bastion of military power for the region, wars and shifting governments eventually rendered the location useless, and it was left to be reclaimed by the wilderness. Over time, the sub-basement of the garrison was found by the followers of Tharkuloc, the Great Blight, an adult green dragon fascinated with all things arcane. While it does not act as Tharkuloc’s lair, his minions reside within and conduct experiments focused on expanding Tharkuloc’s innate power. Led by a cruel tiefling named Penance, the minions steal dragon eggs as they find them, while Tharkuloc’s magic prevents direct dragon retaliation.
Travelling to the remains of Tarma Garrison takes two to three days from the nearest settlement. Adventurers that succeed on a DC 15 Wisdom (Survival) or Intelligence (History) may find the ruins within one to two days, depending on pace.
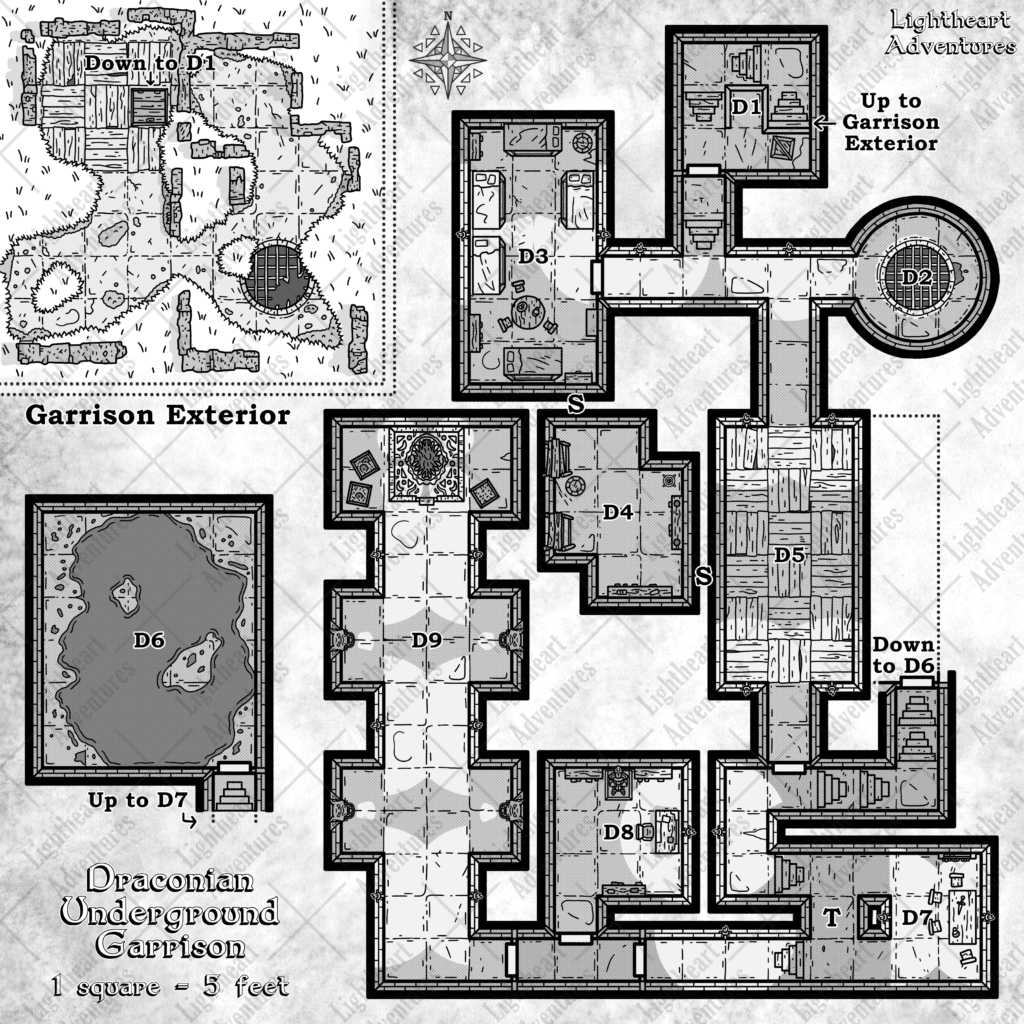
Garrison Exterior
Broken walls dot the landscape all around the remains of Tarma Garrison. Time has not been kind to the remains of the fort, though amateur archeologists may still follow the cracked flagstones through rooms no longer standing.
Entrances. Buried beneath a pile of toppled lumber hides a simple five-foot-wide iron-reinforced trapdoor leading to a dilapidated basement (D1). Spotting the door requires a DC 13 Wisdom (Perception) check. The trapdoor is locked, but not trapped. Opening it requires a DC 12 Dexterity check using thieves’ tools, a DC 14 Strength (Athletics) to break it open, or with a key.
Nearby, a ten-foot-diameter sewer grate with broken bars descends into the darkness below. A medium-sized creature or smaller can squeeze through the broken bars which descends 20 feet to the floor below. Rope is easily tied to the remaining bars.
Patrols. A contingent of three draconian foot soldiers led by a pair of green dragonborn scouts patrol the grasslands around the ruins. Slipping past them requires a DC 14 Dexterity (Stealth) check. If discovered, the patrol attacks, though at least one scout attempts to break away and return to the garrison. Both scouts hold keys that unlock the trapdoor to the basement (D1)
Garrison interior General features
The walls, floors, and ceilings of the garrison are made of solid mortared stone unless otherwise stated. Doors are made of sturdy oak with iron bandings for reinforcement, and are unlocked and not trapped unless otherwise stated. Ceilings are 12 feet high.
D1. Dilapidated Basement
Worn wooden stairs lead down to a bare fifteen-foot-diameter room. Dusty crates sit in the corner, while the only door leads to the south. The only light comes from the cracks in the wood slat ceiling above. The door is neither trapped or locked.
D2. Drainage
Water drips down from above into a gated cistern. The iron bars are covered in rust, but stay firmly in place. A passageway to the west splits off into three directions: towards a wood-floored room to the south, a closed door to the west, and up a short flight of stairs to the north.
Treasure. Peering into the water just beneath the bars requires a DC 16 Intelligence (Investigation). On a success, the adventurers spot a glimmer of metal that is roughly five feet down. Anyone who can reach through the bars and grasp the item pull out a handful (2 to 3) of small silver dragon scales worth 75 GP each.
D3. Barracks
Old military bunks line the walls of this 15 ft. by 30 ft. room. Two torches sputter inside sconces illuminating a table covered with the remains of a half-eaten meal. A dwarf dragon chosen sits on the lower bunk across from the door while polishing a shortsword. They attack any intruders on sight. There is little of value in this room.
Secret Passage. A secret door hides in plain sight against the southern wall. Spotting it requires a DC 20 Intelligence (investigation) or Wisdom (Perception). The door has no handle, but grooves in the stonework allow the door to pull outwards with a little effort.
D4. Old Storage
Cobwebs cover the walls and floor of this forgotten chamber. Old scaffolding rests against the western wall, while two long bookshelves, laden with heavy tomes sit against the southern and eastern walls.
Treasure. The shelves hold 40 books total, most of which contain information about old military records regarding the garrison in its prime. A historian might find these books a fascinating read, and would pay 10 gold per book. However, pressed between the pages of one book is a spell scroll containing the 2nd level spell knock. Spotting this scroll requires a successful DC 16 Intelligence (Investigation) check.
Secret Passage. A door-shaped outline is easily seen on the wall next to the eastern bookshelf. Pulling on the door leads to the midway point within the refurbished tunnel (D5). The door does not open from the other side.
D5. Refurbished Tunnel
Planks of wood stacked haphazardly form the walkway across the room. Every step causes the wood to creak and groan, threatening to pitch the unwary to the floor below. Across the way a single door sits on the western wall. It is unlocked and not trapped.
Wood planks. Walking across the wood planks requires a DC 8 Dexterity saving throw for every 15 feet traveled. Failure causes a creature to slip between the planks and plummet 20 ft. into the floor below (D6), landing in 3 ft. deep water (reduce falling distance by 10 ft).
Secret door. A nearly imperceptible door hides on the western wall. A successful DC 15 Wisdom (Perception) check is needed to spot it. It does not open from this side. Any creatures that enter this room from D4 only need to make one DC 8 Dexterity saving throw to reach the southern or northern door.
D6. Sub-basement
Murky, waist-deep water pools flood large sections of the uneven floor. Piles of decaying bones from failed experiments long past rest just below the waterline. A single iron door ensconced in the south-east corner is shut. The only light shines down through the cracks in the wood overhead. Disturbing the water or opening the iron door causes the dragonblood ooze living in the water to attack.
Iron door. This heavy-duty door is barricaded from the other side. A successful DC 18 Strength (Athletics) is required to knock it down. Any creatures entering from D7 may remove the bar with little effort.
D7. Guard Room
Beyond the reinforced tunnel the corridor forks: the eastern way leads down a flight of stairs to a barred iron door, while the western path winds down to a short guard room partially covered in darkness. A table sits against the eastern wall, covered with half-eaten rations and weapons. A weapon rack with four shortswords sits next to the table. A draconian infiltrator and a draconian foot soldier are deep in a theological discussion if not alerted. A flight of stairs around the corner lead further down to an unlocked door.
Traps. Penance ensorcelled the flagstone on the western side of the pillar with a magic mouth enchantment. Any creatures that step on the tile trigger the magic mouth to replicate the voice of an adult green dragon shouting “Beware interlopers! Whither before the Great Blight” in Draconic. This alerts the two nearby guards. The enchantment may be dispelled with a successful DC 12 Intelligence (Arcana) check while using thieves’ tools.
D8. Penance's Study
Inside of a narrow hallway sits an iron-reinforced door against the northern wall. The door is sealed via an arcane lock enchantment. Penance placed the spell, with her keyword being “Great Blight”, spoken in Draconic. She shares the password with the dwarf chosen in D3.
Beyond the locked door is a small study with minimal furnishings. An ornamental suit of armor sits flanked between two bookshelves, while a lavish desk resides nearest the eastern side of the room. The desk is covered in notes and arcane scribblings detailing how to create new life from dragon eggs.
Treasure. The bookshelves in the room hold a number of books dealing with dragon anatomy and magical theory, but are worth little. Inside one of the desk’s drawers is a small pouch containing 20 small silver dragon scales worth 75 gp each and a small curved +1 dagger.
D9. Ceremonial Chamber
Once past the door, the chamber stretches forward towards a glowing altar, runes upon its surface surrounding an altar made of the jawbones of a dragon. Five foot deep alcoves sit in intervals along the length of the room with stone dragon heads looking out towards the center, their mouths open and lit from within. Penance (dragon blessed) stands before the altar and performs a ritual to mutate the stolen amethyst eggs into more dragonkin. She turns if interrupted and attacks any intruders. Penance fights to the death.
Lair actions. On initiative 20, all four dragon heads expel fire in a 10 ft. cube in front of them. Creatures within the area must succeed on a DC 12 Dexterity saving throw or take 2d8 fire damage, or half as much damage on a successful save. The dragon heads recharge their breath on a roll of 5 or 6.
Dragonmaw altar. The source of Penance’s power – a powerful artefact made from the bones of a slain rival that masks Tharkuloc’s efforts to convert generations of dragons into his thrall. Eggs placed within the open maw begin to transform over the course of days into ones capable of spawning draconians. Marring the runes on the surface of the altar or knocking over the bones disturbs the enchantment, allowing Aunarthalkalah or other dragons to intervene. A single gem-like egg rests within the open maw.
Treasure. To the left of the altar sits two open crates stuffed with straw. Inside those crates are three large gem-like eggs belonging to Aunarthalkalah. Each weighs 20 lbs, and shift subtly if held. Penance holds a carved dragonbone wand that acts as a divine focus and is worth 250 GP.
Epilogue
Aunarthalkalah waits above if the adventurers manage to stop the enchantment on the Dragonmaw altar, otherwise she waits where the adventurers first encountered her. Her posture shifts from unease to frantic relief once the eggs are returned to her. As a reward, she grants the adventurers a favor in the future should they need her, as well as a scaled ornament (Stirring) in the shape of a fine silk cloak with an inner lining that appears like purple scales. While attuned to this magic item, the wearer can speak and understand Draconic. She profusely thanks the adventurers before taking the eggs and leaving in her original shape. The unnatural storms within the region cease within hours of Aunarthalkalah receiving her eggs.
If any of the four eggs are damaged or destroyed, she is more restrained in her gratitude, accepting the remaining eggs though she only grants the adventurers the scaled ornament as per their agreement.
If the adventurers return with none of the eggs, she swears an oath of revenge on the party and leaves without another word. At some point in the near future she enacts her vengeance.
Wrap up
I really enjoyed messing around with the content found in Fizban’s, and I can’t wait to really dig into some more adventure design using the book! I think it’s safe to say we’ll be seeing more dragon-focused encounters in the near future. If you liked this Free Fizban’s Dragon adventure, feel free to leave a comment below or drop a comment on Twitter, Facebook, Instagram, or Discord to let us know how it went! If you’d like access to more maps and content, including downloadable PDFs of our adventures, check out our Patreon. We’re able to do what we do because of all our amazing Patrons!