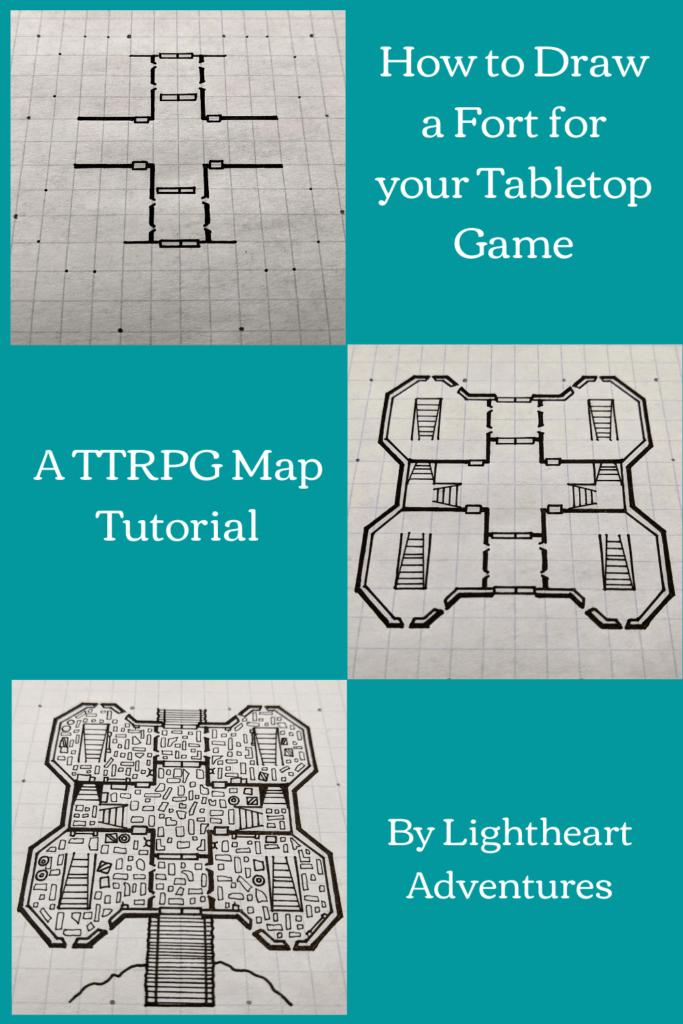
There are many ways to draw maps for tabletop games. Sometimes you doodle out small dungeons on legal paper while sitting on long conference calls. Sometimes you “Bob Ross” your way, placing “Happy little Mimics” where ever pleases you. Of course there are also the times you have to hastily sketch out a jail cell mid-session because your party decides to jailbreak the rogue who stole one too many treasures from the king. Today, I’d like to delve into my process for drawing maps and show you how to draw a fort!
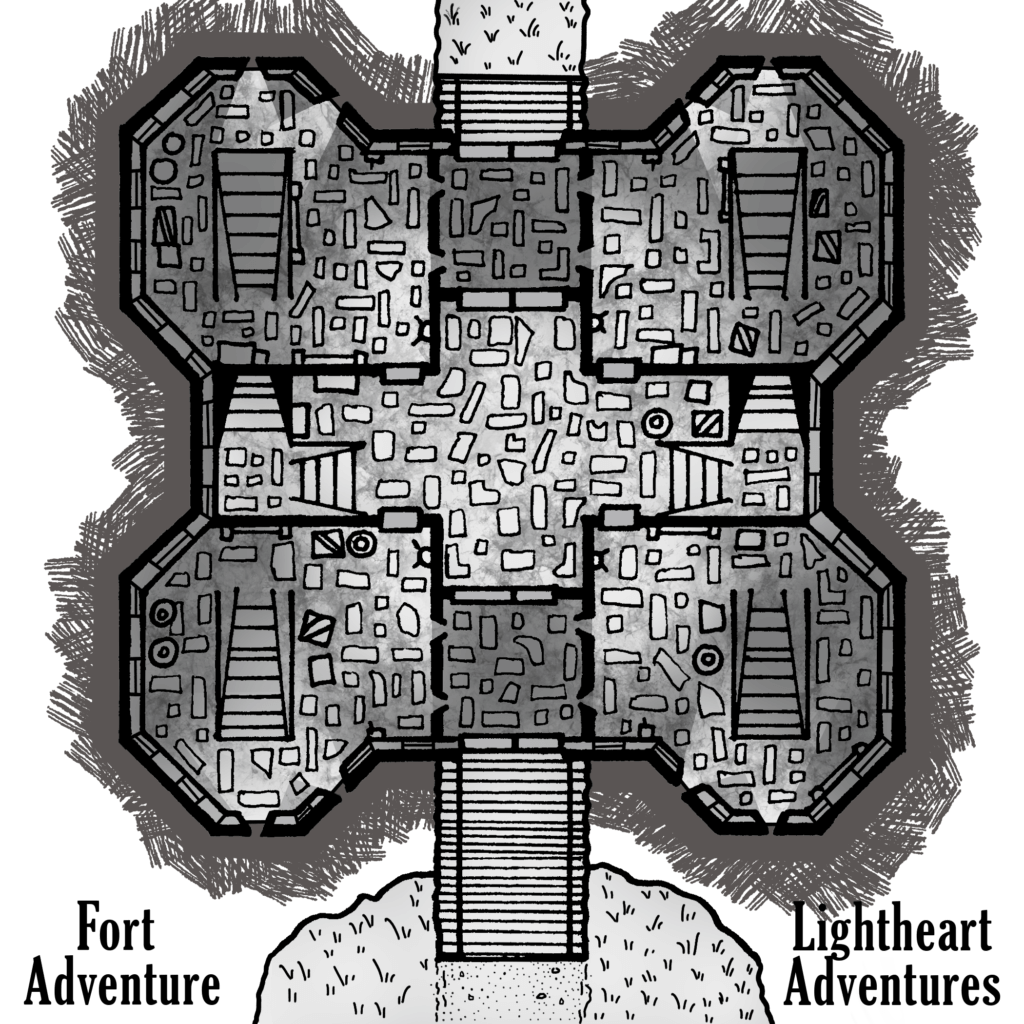
Welcome to Fort Adventure!
(Not to be confused with Fort Lawsuit)
Disclaimer: This post includes affiliate links, which means that if you choose to purchase something after clicking on one of the links, we may receive a small commission, at no additional cost to you. Thanks for supporting your favorite dungeon artists!
How to Draw a Fort Step 1: Blocking
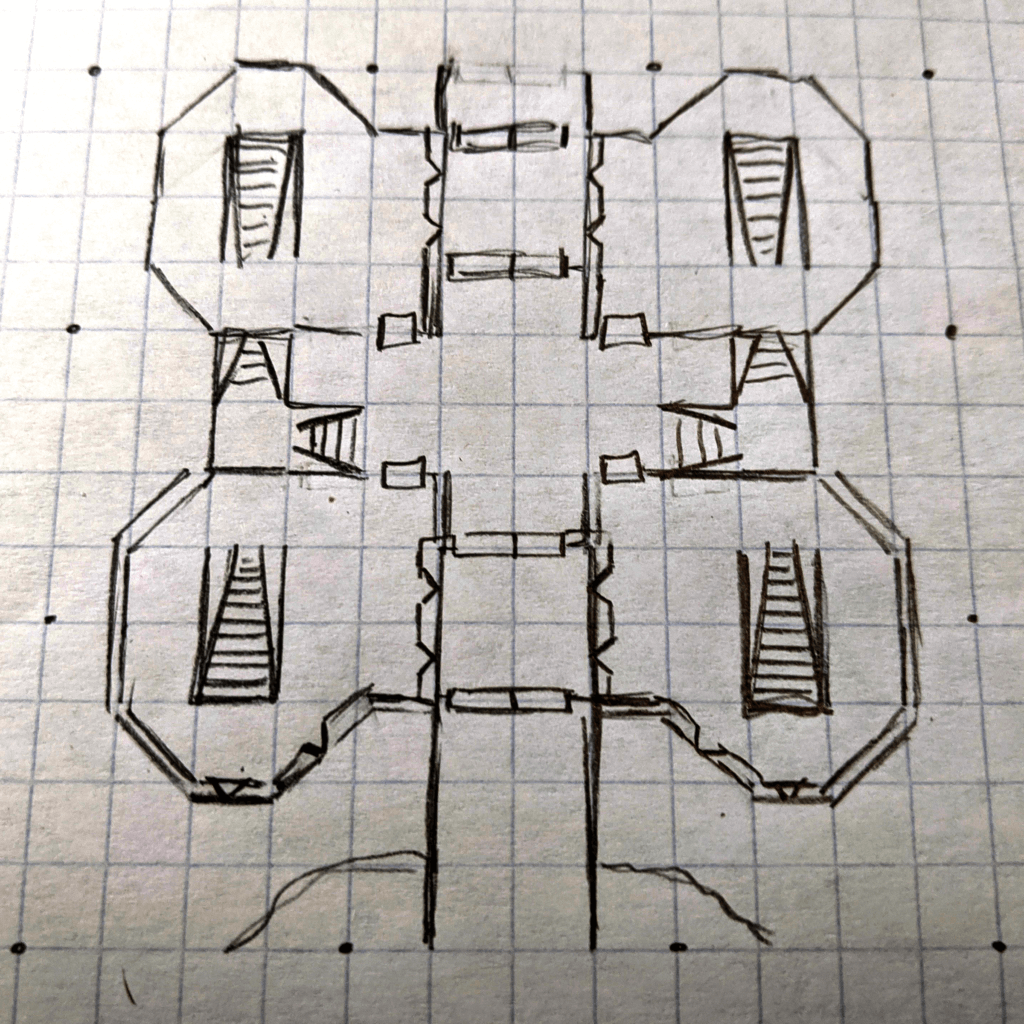
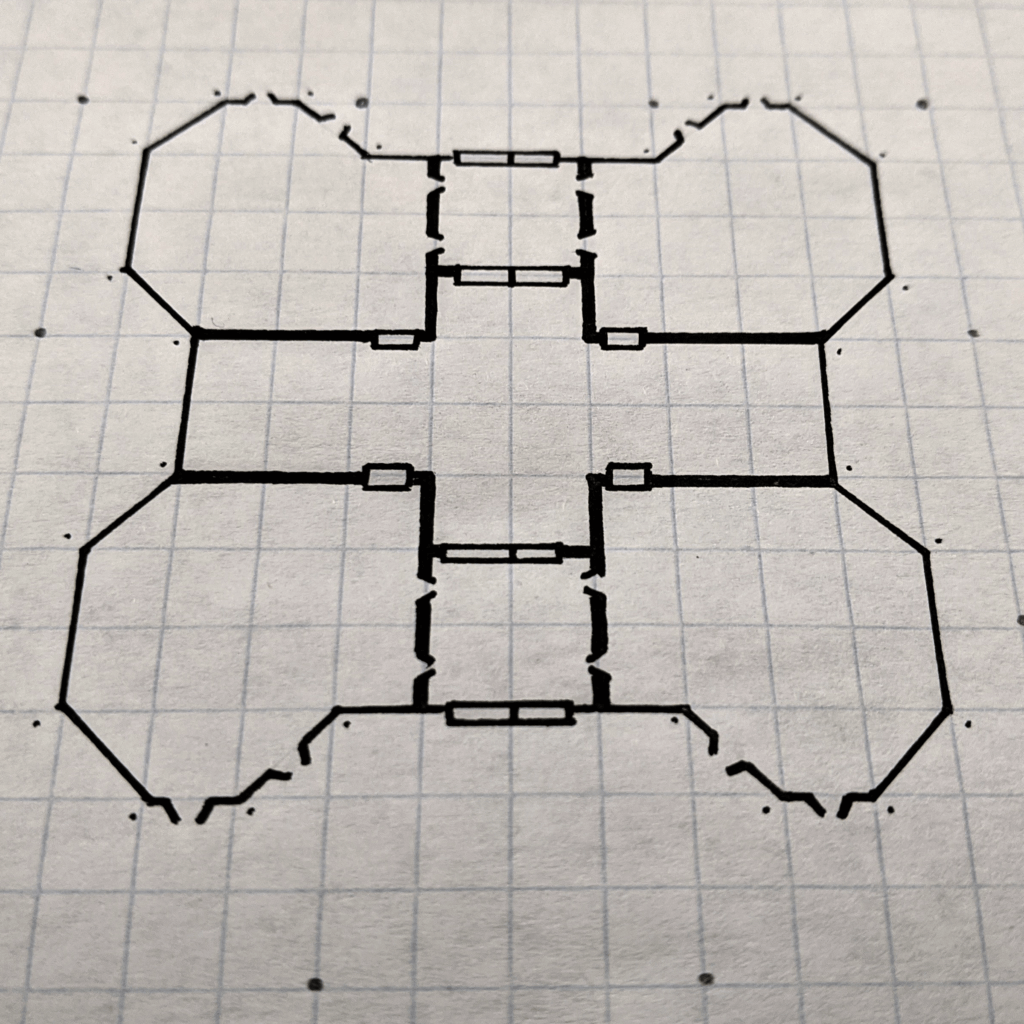
Once I settle on an idea for a map, I determine how big a space I can work with. For this piece, I wanted to stick with a three by three inch grid. When blocking, I start by drawing rough shapes with a mechanical pencil to figure out what kind of rooms I want. Now’s the time to play with the size and layout of the rooms. Depending on how much time I have to complete the map, I may run through a few drafts before I settle on a layout I’m satisfied with.
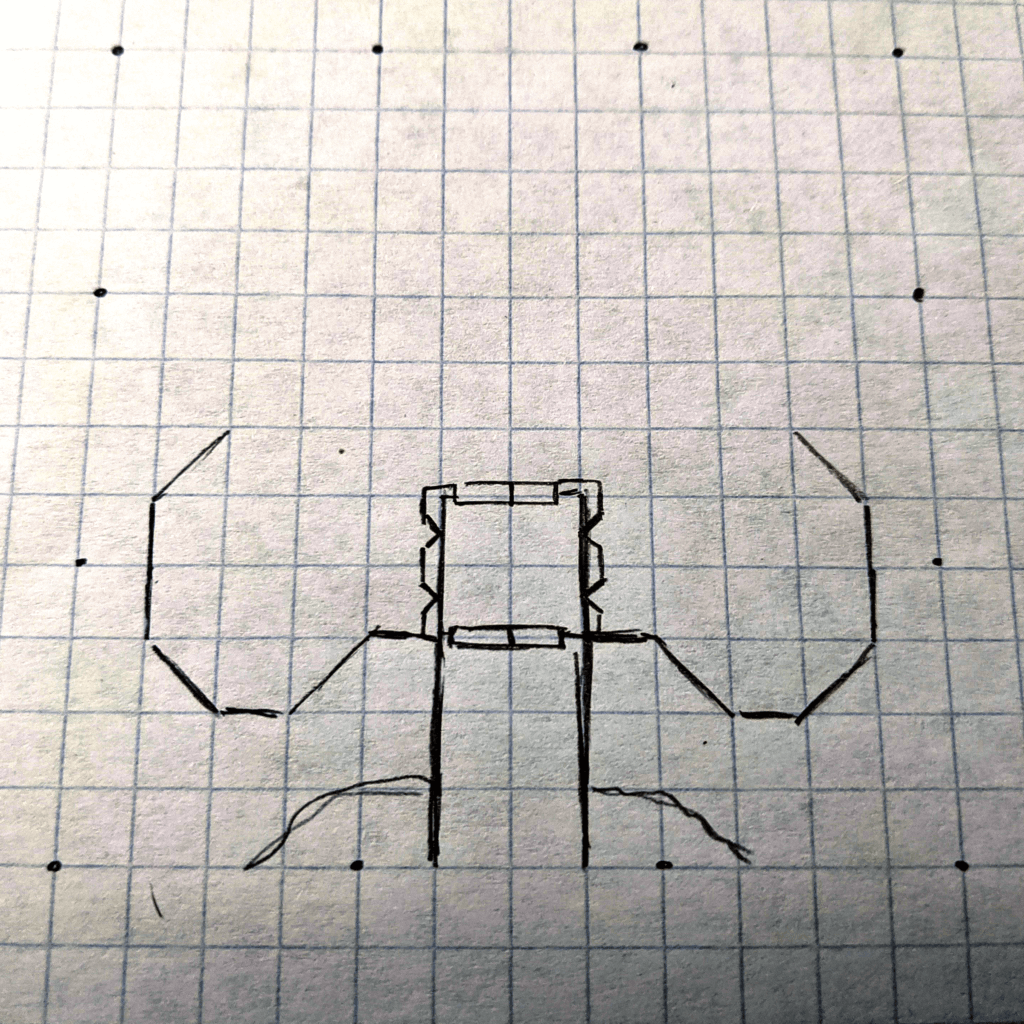
While I experiment with rooms, I also add in room features such as doors, stairwells, windows, or arrow slits. Play around until you’re satisfied with the results, as once you start to ink your map, making changes can be rather irksome!
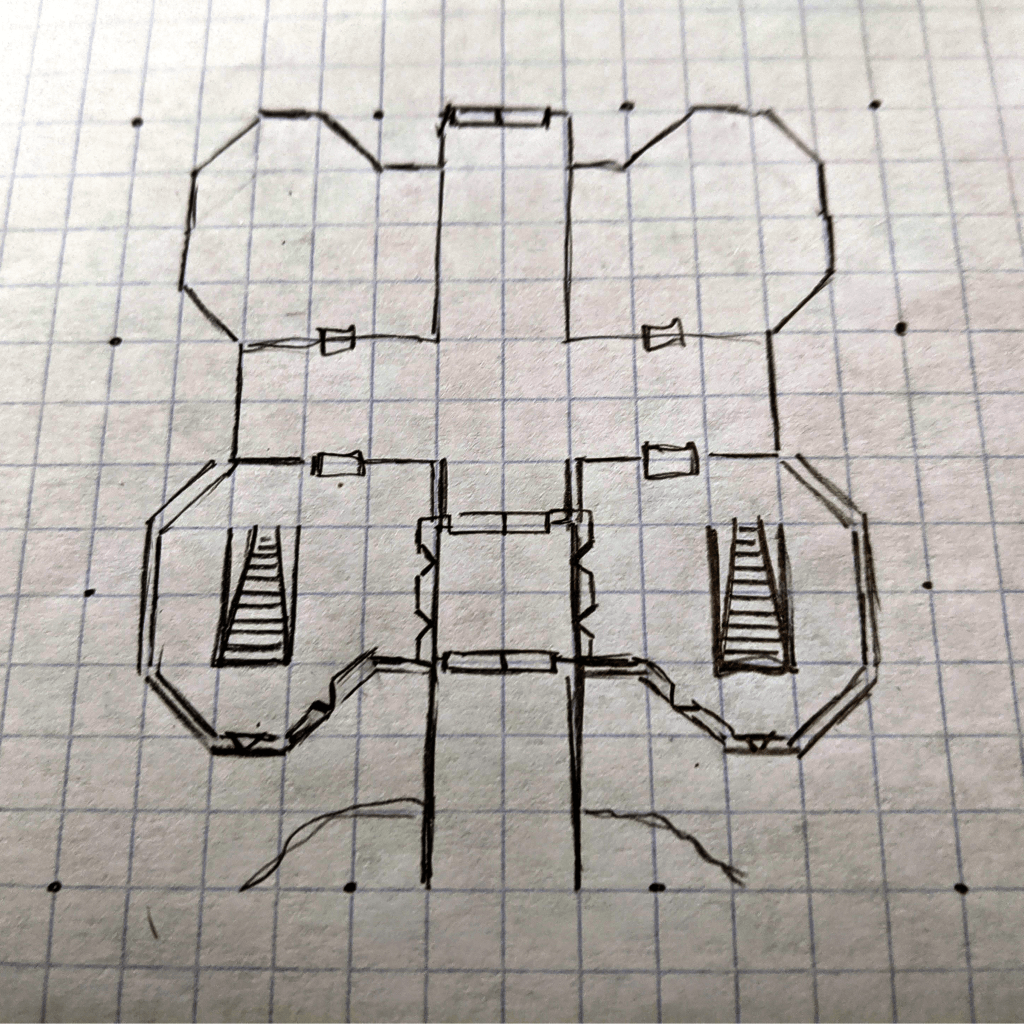
Step 2: Inking
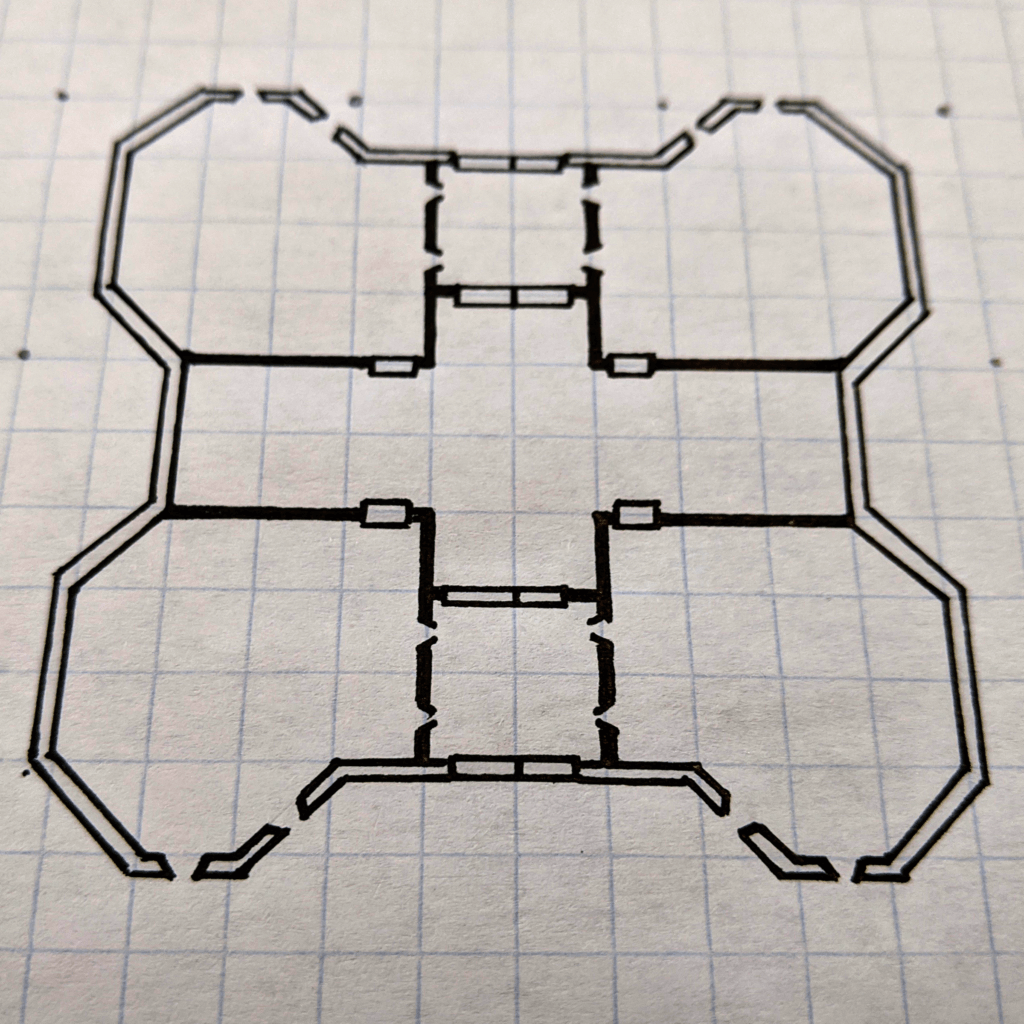
When I start the inking process, I usually start drawing on a fresh section of the paper. I am not fond of drawing over top my pencil lines, as it feels sloppy to clean up stray pencil marks. The first details I add are doors as well as the corners of walls, which creates a connect-the-dots appearance on the page that I’ll use to guide my straight edge. I do this part with a .5 Copic pen.
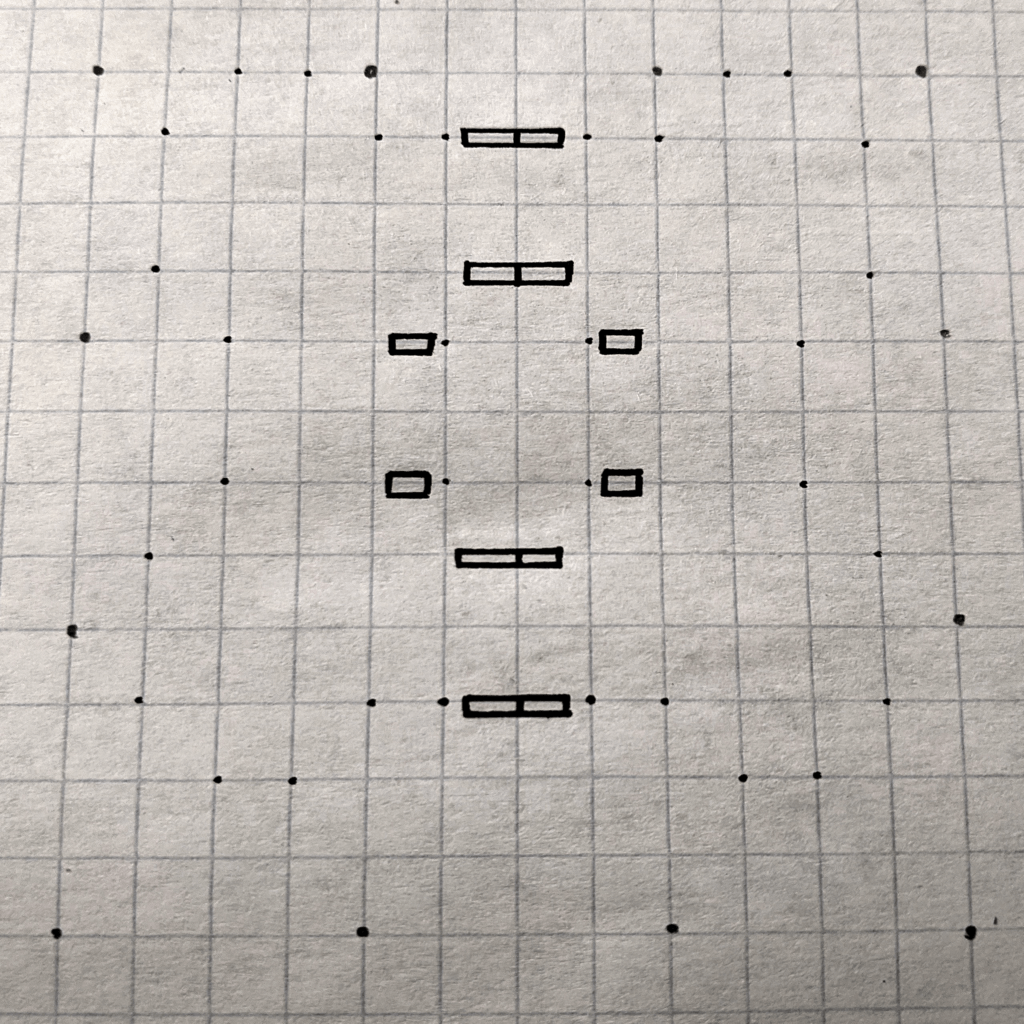
One of the small map flavors I’ve picked up while experimenting is that I add a second line to interior walls to create a bolder definition between rooms.
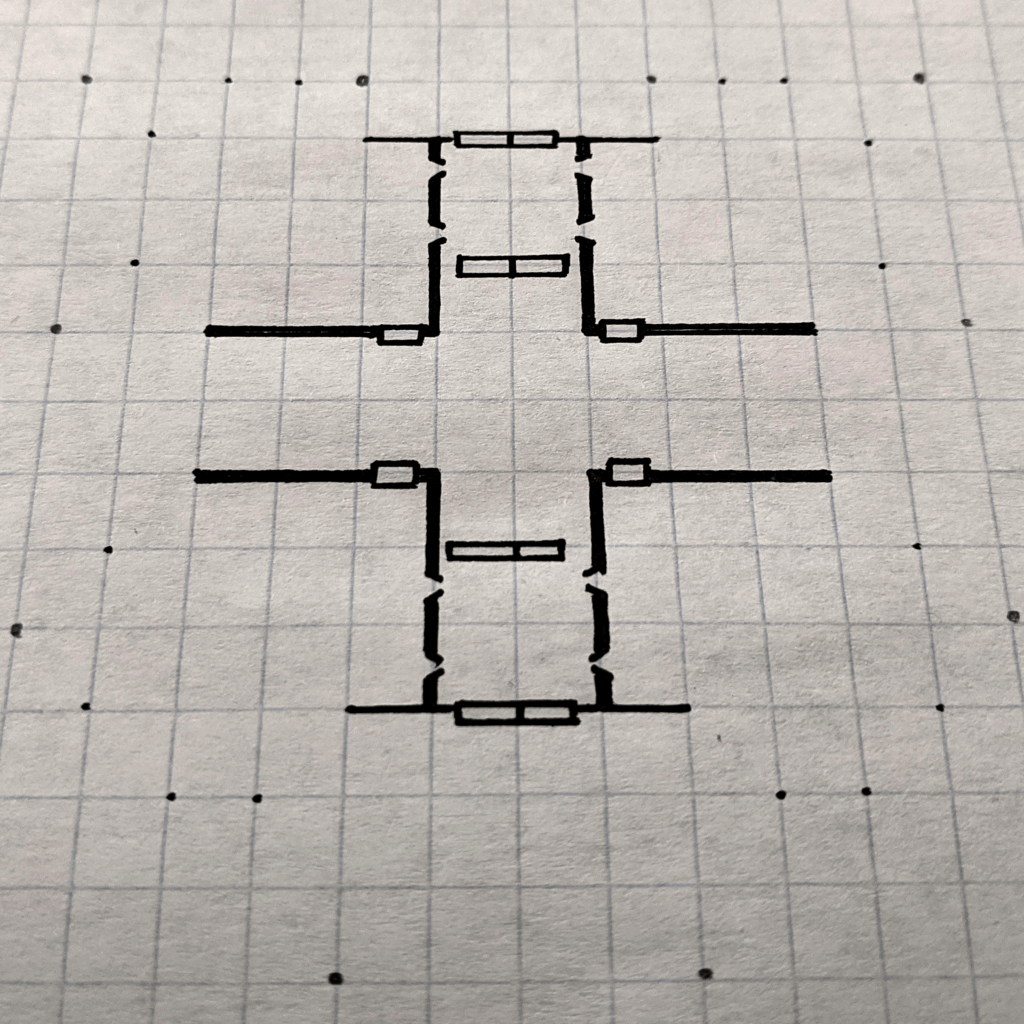
Exterior walls are a little different. Once I finish fully tracing the first line (making sure to leave gaps for arrow slits or breaks), I mark points at each corner 1/16th of an inch away from the wall.
This pushes out the exterior wall slightly, where I’ll add details later in the process. I then go over the outer line a second time to match the wall thickness like the interior walls.
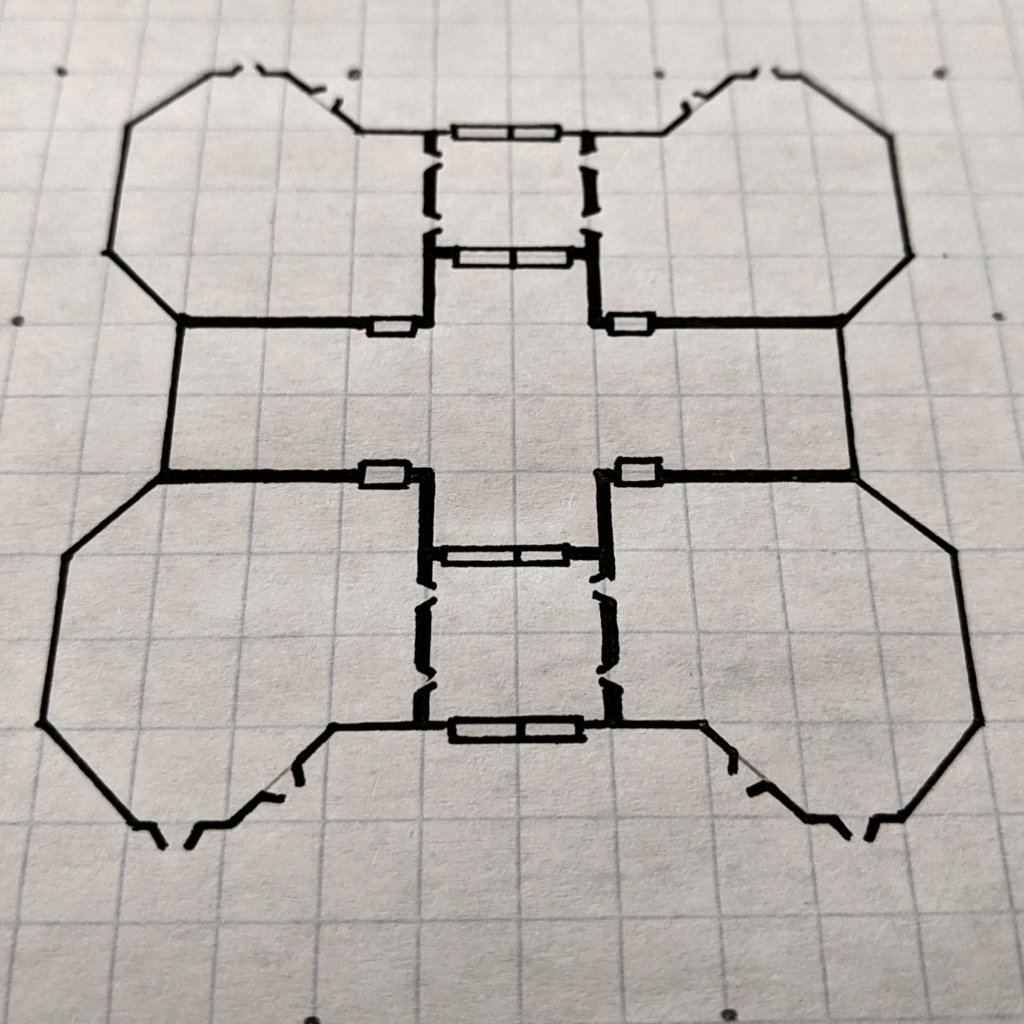
Step 3: Details!
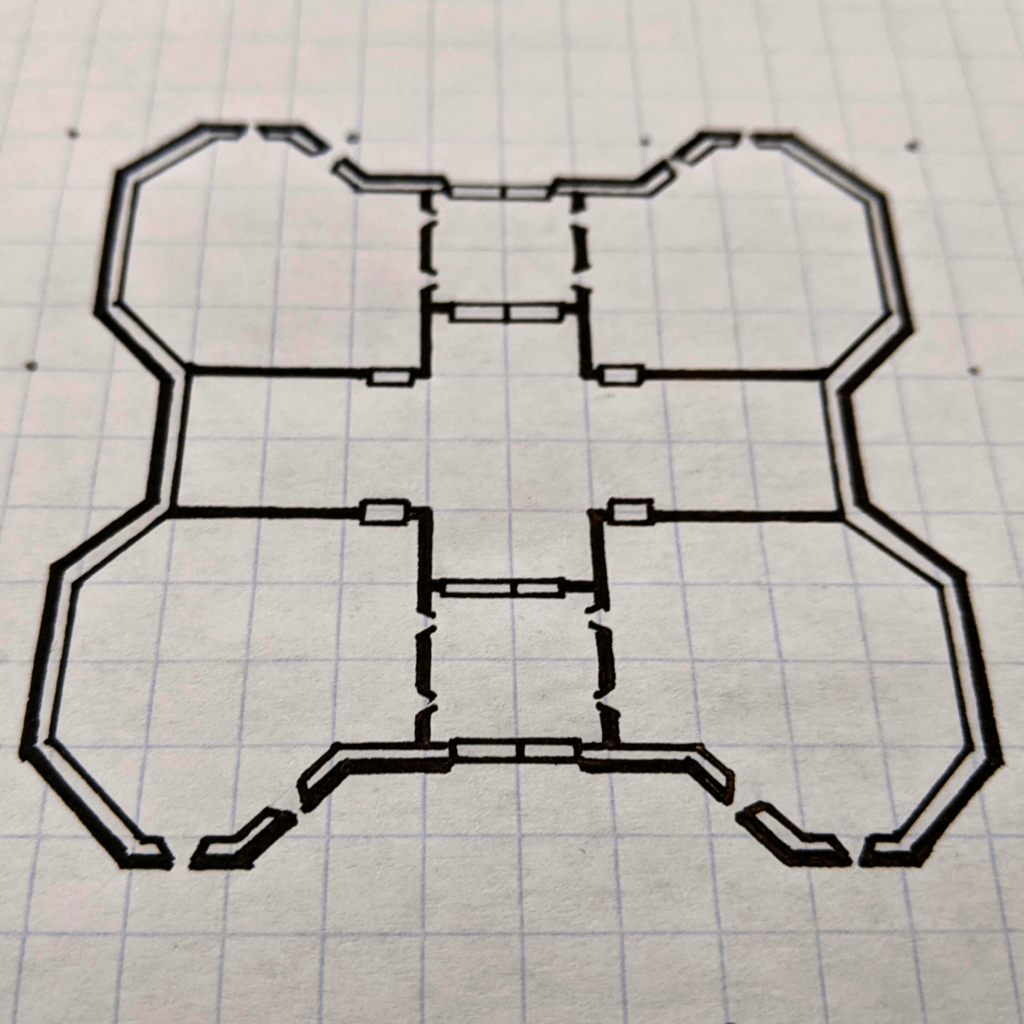
Next up come smaller room features with a .25 pen, including boxes, barrels, weapon racks, and other details that adventurers could conceivably find inside a fort’s tower.
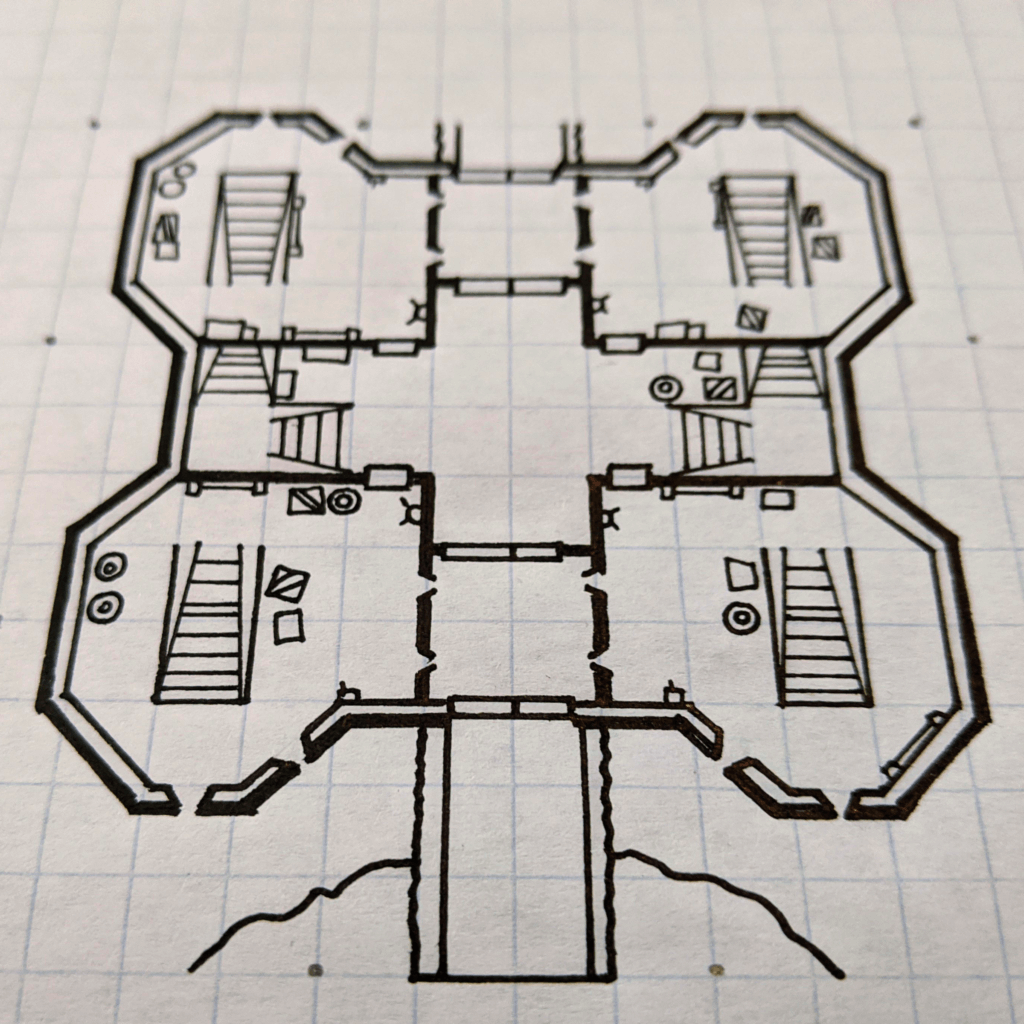
Lastly, small floor details join the adventure with a .1 pen to give the piece a lived-in look. When I originally started doing the floor details I used the same size pen for both objects and the floor, which made it hard to differentiate floor details from others. By using finer details for the floors, I find it’s easier for players to see the separation between items. If you’re having a hard time drawing a circle, deciding on a unique shape, or just want to reference sizing for your furniture, I find that using stencils can come in handy as well.

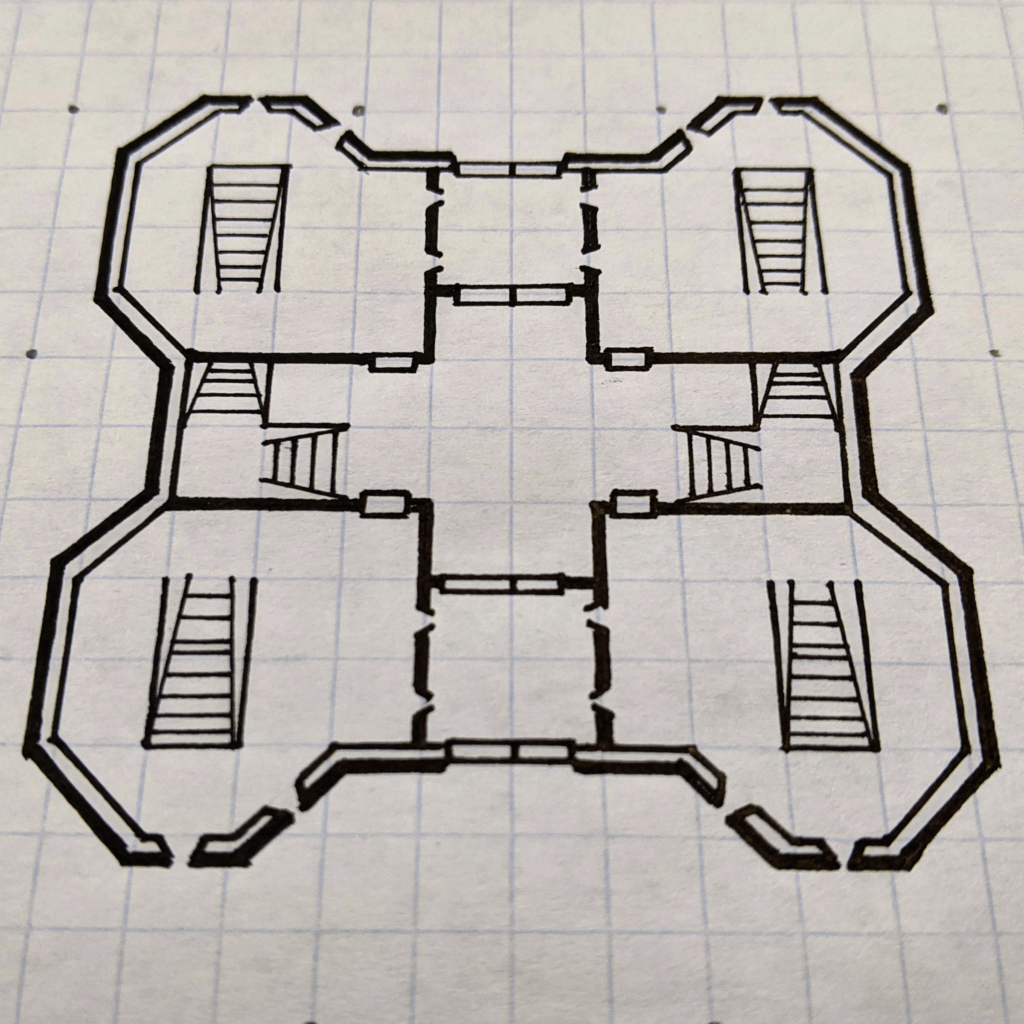
Once you’re working on the fun, detailed portion of your map, the customization options are endless. Try adding extra textures of dirt, scratch-marks on the stones, or filling the empty area around the fort with even more details. It’s all up to you and your imagination on how to draw a Fort Adventure of your own!
To learn how to take your map from fully inked to a pristine digital version, check out our Tools of the Trade: Let’s Get Digital post.
Whatever you do wind up creating, be sure to tag us on Instagram or Twitter so we can see what you made!